Friday, February 27, 2015

Duluth Trees with Frieda Anderson

We're in Hampton, Virginia for the Mid-Atlantic Quilt Festival and decided to take a class with Frieda Anderson to learn her method of fusible collage quilts.  The project we made is called Duluth Trees.  Frieda provides a kit of her hand dyed fabrics with gorgeous, saturated colors. Her method of assembly uses wonder under fusible (805) so we started off by fusing it to the back of our two largest pieces of fabric, both gradated from blue to green, one bright, one darker.  From there, we started cutting large rectangles that would be the background of the trees, and added some shorter pieces at either end.
We also learned how to make "stripey" units to add interest.
 Here's Elizabeth working on her background arrangement.
Above is Sue's background arrangement.
 This is a display of Frieda's many designs - aren't they spectacular?
This is one of her class samples of the project we were making.  This one is heavily quilted.  The other had very little visible quilting - either method is very effective.
Sue was adding the green triangles to the pine trees, Elizabeth's piece is the one at the bottom of the photo.
 Sue's piece is all fused and ready to be "sandwiched" with batting and backing.
 Thanks for a great class, Frieda!

Saturday, February 21, 2015

Searching for Roy G Biv

We're joining up with Julie Booth's monthly search for the colors of the rainbow by posting some ORANGE pictures.  It's hard to choose just 5, and since there are 2 of us, I decided on 3 from each of us to keep it even!  We have more examples of orange in nature and our work than I realized.  I would not have thought of orange as one of my favorite colors, but recently find myself drawn to it more and more.  It certainly brightens things up!
 This collage by Elizabeth features screen printing.
 A day lily in the neighborhood brings welcome thoughts of summer.
 Felted pumpkins and acorns by Sue on a table runner with bits of orange.
 This gorgeous sunset is from Elizabeth's summer cottage on Lake Winnepesaukee.
Printing with an orange in orange paint on yellow hand-dyed fabric by Sue.
Cheerful orange cone flowers, photo by Elizabeth.

Friday, February 20, 2015

Snow Dyeing Results

And the results are in!  The pictures below show the range of results from the turkey red and kingfisher blue snow dyes.  The variations, of course are due to the underlying colors. The pink/red pieces have a bit more texture than the blue.

I did a second smaller batch of snow dyeing too, again over dyeing some pieces that needed improvement. One was a Pepto Bismol pink with lots of white space, and the other 2 were purples that were less than interesting.  This time I sprinkled the dye powder over the soda ash-soaked fabric and packed the snow on top.

After batching for a day, I did a couple of rinses and then an overnight soak in hot water with synthropol and then a hot water machine wash the next day.  I like the results of using the powdered dye better than liquid dye concentrate.  I think there's a lot more color separation and texture from using the powder with snow on top.  What do you think?


Wednesday, February 18, 2015

February Snow Dyeing Continued

Yesterday you saw Elizabeth's process for snow dyeing.  Today I'll show you what I (Sue) did yesterday.  I set up 2 batches of fabric for snow dyeing, all being previously dyed pieces that were less than interesting.  One group was mostly bluish green, while the others were pink and red.  Both pans have pieces above and below the screen.  Especially with the pinks I had a bunch of small pieces.

I tried a new set up on this pan, using a piece of screening cut from a roll and binder clips to pull it tight over the pan.  It worked well, and allows me to use a bigger pan than I was previously using with the sleeve method, which you can see in this post.

I followed my usual method of mounding the snow on top and then pouring the dye concentrate over all, like a big snow cone.  One batch got Kingfisher Blue dye, the other is Turkey Red.


It sat for about 22 hours, and this morning I started the rinsing process.  Most sources tell you to rinse the fabric until the water runs clear, and then machine wash in hot water with Synthropol soap, which helps remove the excess dye, and this is what I normally do.  However while pre-soaking these fabrics in the soda ash solution, I noticed that a lot of color still came out from the original dyeing.  So I decided to try a method that Vicki Welsh uses; since she sells her hand-dyed fabric on Etsy, I thought it might well be worth the extra time.  Vicki does a 12 hour boiling water bath before machine washing, and does not have a problem with her colors running.  So that's where my fabrics are now - soaking for 12 hours.  We'll see what the results are tomorrow!  And perhaps results from Elizabeth's dyeing as well.   

Tuesday, February 17, 2015

Snow Dyeing, Round 2

We finally got our first "big" snow of the winter, so time for another round of snow dyeing.  Elizabeth and I are each doing our own batches by different methods in our separate houses, so today we'll start with Elizabeth's project.  In her January round of dyeing, she experimented with sprinkling the dry dye powder under the snow, instead of diluting it in a concentrated solution.  This time, she's experimenting with sprinkling the dye on top of the snow.  This happens to be a very dry powdery snow so extra snow was added to the pile and it was compressed by patting.
Uninspiring fabrics were "scrunched" on the screen with is suspended over a catch basin in the bathtub.
A five gallon bucket of snow was piled on top and patted down.
Dry dye powder (dark green) was liberally sprinkled on top of the snow mound.
Green is definitely made from yellow and blue.
You can see the individual grains of dye disperse their colors.

Check back tomorrow for more!


Saturday, February 14, 2015

Winter Oaks Almost Done

I've spent some time since my last post working to finish this quilt.  The first thing I had to do was block it, which I don't often do.  But after finishing the quilting I noticed that the bottom edge was kind of ripply.  Turned out it was about a half inch wider at the bottom.  I'm pretty sure this happened because the background piecing is off grain and could easily have stretched.  In order for it to hang flat, and since I'm planning to submit it to a show, I knew that blocking was necessary.  I followed Vicki Welsh's blocking instructions here, with a few changes.  I didn't want to wash it, since it has some Transfer Artist Paper and tyvec on it that I didn't want to put through the washing machine.  Instead, I took a water bottle and sprayed the back to wet it, just enough to penetrate all the layers.  I put an old bath towel on the floor first, and then the quilt and pinned it through to the padding of the carpet, stretching and squaring it up as I went.  I let it dry for 24 hours before removing the pins.
I've also added the label, made the sleeve, and attached the binding.  I'm in the process of hand stitching the back side of the binding, and then have to add the sleeve.  Looks like I will meet my goals of finishing in time for the show deadline, and completing one of my UFO's in February!

Monday, February 9, 2015

Progress on UFO

Last week I got back to working on my Winter Oaks piece.  I want to submit it for the Sacred Threads exhibit, and the deadline is coming up in exactly a month, so time to get it done!  I've finished all the background quilting.  All that's left is a little corner of tree, and the border.  Then all the finishing details - binding, sleeve, label.  The end is in sight.


Friday, February 6, 2015

Felted Bowl

Sometimes we work with fibers other than fabric.  Sue recently finished a knitting project, making a bowl from wool yarn that was knit, then felted by washing in hot water in the washer.  The edge of the bowl folds to the outside - if you turn it upside down, it looks like a pillbox hat! Perfect for holding some of those other yarns and fibers in your stash.

The pattern for this is in Noro knitting magazine, the Fall 2012 issue.  All the patterns are designed for use with Noro yarns.  I actually used a brand of yarn called Gina. 
Above is a picture showing 2 bowls - there are instructions for 3 different sizes.  I made the smallest size.
This is my work in progress.
 Above is the bowl after binding off and stitching the edges together. Below is the bowl after felting.  To felt it, it was washed in the washing machine in hot water along with a couple of old towels to provide some agitation.  I actually washed it twice because it was only partially felted after the first washing.  After washing it was left to air dry, with some plastic bags stuffed inside to hold the shape.

Wednesday, February 4, 2015

UFO Busting

This is a little late, but better late than never, right?  We're linking up with Vicki Welsh of Field Trips in Fiber in her quest to get some UFO's out of the studio.  Click on her badge on the sidebar for a direct link to her post about it.  At the end of every month I'll do a post about what I've accomplished that month, and link it to Vicki's. 

I (Sue) started out January with 8 projects in process - at least, that's 8 that are the most recent that I want to finish!  Of course there are more, but they have been packed away in the archives so long that I won't pull them out just yet.  If I finish these 8 this year it will be a major accomplishment!


Three of these are tops that need to be quilted, 2 are piecing projects in progress, one is getting some hand embroidery, and the one with the cardinal is up next for finishing (I am in the process of machine quilting it).  There's one missing from the picture which is a table runner also ready for quilting.

So for Vicki's end of month count, this is where things stand:
  • Projects in progress Jan. 1 - 8
  • Projects completed - 2
  • New projects started - 2
  • UFO's trashed - 0
  • Projects in progress Jan. 31 - 8
As you can see, I didn't make any progress on the UFO's, but I did complete 2 new projects!  Both are 10 inch square quilts that I submitted to a reader's challenge which was due Feb. 1, so had to be finished.  And good news!  Both were selected as finalists!  (No pictures just yet.)  The piece that I plan to finish next is another I want to submit to a show with an entry deadline, so that will definitely get finished in February.  And I have another new one I need to do for March (just 12" square) so it looks like I'll at least come out even.  Hopefully I'll make progress on some of the others as well.

Tuesday, February 3, 2015

Final Snow Dye Results

The last pieces from the snow dyeing experiment where powdered dye was placed under the snow are these two. They are larger than the pieces shown yesterday at approximately 16" by 28", and turned out great, don't you think?


Monday, February 2, 2015

Snow Dye Experiment Results

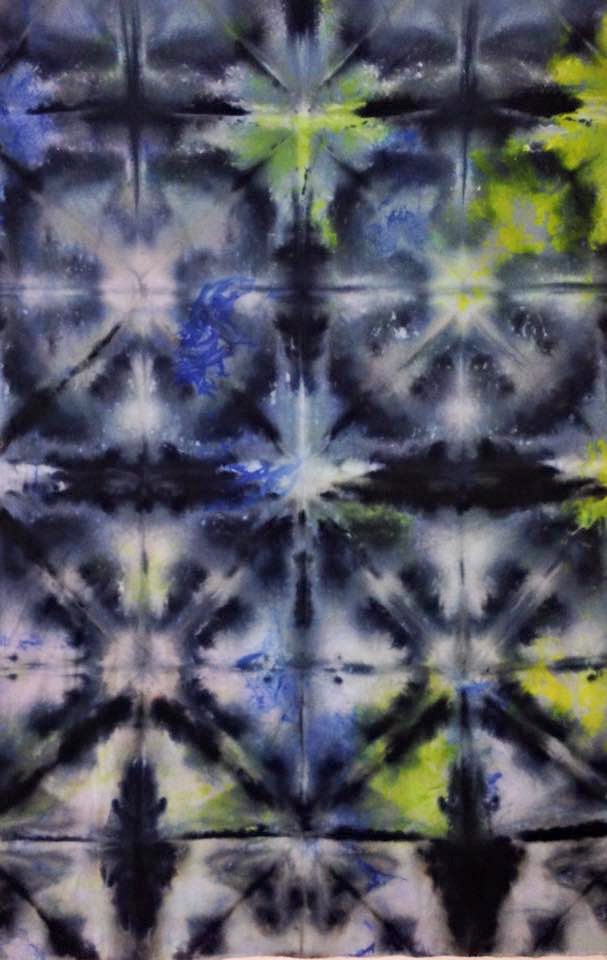
These are the snow dye experiment results on the small pieces. Previously uninspired dyed pieces were soaked in soda ash, ironed and folded, put on a screen over a plastic bin in the bathtub. Then dry dye was put on the folded edges and a light fluffy snow on top. I let it sit for 24 hours after the snow melted and then rinsed, washed and ironed.  As you can see, some of these were tone-on-tone commercial fabrics.