Thursday, January 29, 2015

Arts and Old Lace

I (Sue) was tagged to participate in the Facebook "Share Your Art" challenge, where you post 3 pictures of your quilts for 5 days, and tag someone else each day to share as well.  Today was my first day of sharing and I chose 2 quilts that I did for a local Arts and Old Lace challenge in 2012.  They recently returned from touring in exhibits and I'm not sure I ever blogged about them before.  Consequently, I thought they would be good to share on the blog as well, especially since both feature Thermofax screen printing.  For this challenge, we received a bag that contained various lace remnants and were to incorporate some of it in an 18" quilt - however you chose to interpret "arts and old lace".
The piece above is Architectural Lace.  The screen printed images here are made from photos I took of various architectural images such as round windows in churches and decorative elements of Victorian houses.  By cropping those elements out of the photos I converted them to black & white images to create Thermofax screens.  The lace panel with the buttons on it and the narrower bands of lace were all from the challenge bag.  Below is a detail of one part of the printing.
The second piece I call Nature's Lace.  I combined screens of a fern and Queen Anne's lace to create the composition below.  The center of the fern "flower" is also from a piece of lace in the challenge bag. The butterflies are another screen - I showed how I created them with fusible applique in another post recently.
Here's a close-up of the printing and quilting on this one.  It was a challenge as well to figure out how to quilt such "lacey" elements as the ferns and QA lace.

Tuesday, January 27, 2015

Printing Inspiration Package

I recently received a birthday gift of a package of books, DVDs, and other supplies for print making that was offered by Interweave/Quilting Daily.  Look at all this inspiration!  (A little overwhelming, actually.)
There are 4 books that cover various types of printing - gelli plate printing, screen printing, stamping and carving your own stamps, and Printmaking Unleashed, which features a wealth of over 50  techniques for mark making.  Also included is a pad of printmaking paper, a squeegee, a thermofax screen and stencil by Julie Balzer, and 2 DVDs.  Exploring all these techniques (some new, some not) will keep me busy for quite a while!  Not to mention  another recent book acquisition with more things to try. 
Julie Booth's recent book features fabric printing with food and found objects from the kitchen.  I see lots of ideas for experimentation in PGFiber2Art's future, especially for Quilt Camp 7!

Wednesday, January 21, 2015

Screen Printing - Positive and Negative

Another way to incorporate multiple colors with thermofax printing is to combine positive and negative images.  This series of photos shows using this process on a t-shirt, the positive image being the flower and the negative being the rectangle surrounding it.  First is a practice piece where I was testing out different colors.
The next 3 are the process of printing on the shirt, first the negative shapes and then adding the positive (after the first prints dry).  Last is a dab of paint in the center of the flower with a paint brush.


Another example of positive and negative images is one of the pictures from the last post.
 
In this piece, the green and yellow flowers are both done with positive & negative screens  - a blue outline/centers and yellow and green petals. 

Sunday, January 18, 2015

Screen Printed Fusible Applique

Hand screen printing is typically a one color method of printing.  But there are ways you can incorporate multiple colors without dealing with multiple screens and registration marks.  One way is to blend colors on the screen as you are printing.  Another is to have 2 screens - a positive and a negative, for instance the outline of an object and the interior on a separate screen.  Another way I've found to incorporate color is to print in black on a colored fabric.  I then apply a fusible product, either Pellon Wonder Under or Misty Fuse to the back of the printed fabric, cut out the print (retaining the black outline) and fuse it to the quilt.  Here are some examples.

 The bird was printed on the purple, cut out and fused, and quilted.


This butterfly has been used in a few pieces.

These black-eyed Susans are destined for a new project.  You'll notice that they are cut into individual squares.  That was done on purpose to make the printing easier.  I don't like to waste fabric and wanted to print close together, but I didn't want to get paint on the back of the screen. It was quicker and easier to print on individual pieces.  After printing, I applied the fusible to the back of the squares and then cut them out.  Then they're ready to fuse to your project.

Monday, January 12, 2015

Snow Dye Leftovers

I've called this post "snow dye leftovers" just because I was used the dye leftover from doing the snow dye.  The fabric pieces I used were all fat quarters, one each for the 4 colors without any mixing.  I had not used some of these colors by themselves before, so I did want to see what they looked like alone.  After soaking the pieces in soda ash solution, I scrunched each in the bottom of a plastic container and added the dye.  No additional liquid, but I did use a wooden skewer to move the fabric around a bit to make sure the dye was well distributed.   Then let them sit for 24 hours.
After rinsing, washing and drying, here are the results.  Coral, kingfisher blue, bronze, and elephant grey.  (Obviously I didn't take time to iron them.)  The bronze is actually a bit more brown/gold than it appears in this picture but the other pictures are pretty accurate.


Thursday, January 8, 2015

Snow Dye

We got a surprise few inches of snow this week, which means we got about 2-4 inches when they were only calling for 1-2 inches, and even that forecast didn't really start till Monday for an early morning Tuesday event, so significant snow wasn't really on my radar.  Until it appeared.  And it hit me - time to snow dye!  Hopefully it wouldn't start melting before I made all the preparations; no fear of that, we are in the deep freeze like most of the rest of the east coast and mid-west!

First step was soaking the fabric in a soda ash solution.  According to books I reference, the mixture is 9 tablespoons of soda ash to a gallon of water.  The solution can be kept indefinitely, so I soak the fabric prior to dyeing, rather than adding soda ash to the dye solution, which limits the effective time of the dye.  The fabric should soak in the soda ash for at least 20 minutes.

While that was soaking, I set about preparing my pans and the dye.  I have 2 pan set-ups that I can do at the same time, and decided to do 2 dye colors on each one.  I wasn't doing a lot of fabric - a half yard for each pan plus some small pieces that I put in the pan to catch the drips from the melting snow dye.

Here are the 2 pan set-ups I use.  Both are kitty litter pans, but different sizes.  The purple is largest and I have a screen tacked to wooden stretcher strips that sits on top.  The soda-ashed fabric gets mounded on top of the screen, smaller pieces in the pan below.
 For the green pan, I have taken a mesh produce bag and stretched it over the pan like a sleeve, using binder clips to hold it taught at the ends.  Again, main fabric on top and small pieces in the pan.
 I set both pans in the shower stall of the basement bathroom - my "wet studio"!  Here they are after I collected the snow and packed it on top of each to cover the fabric.
Then I poured the dyes over the top of both, like a giant snow cone.  On the left, I used elephant grey and kingfisher blue.  On the right, I used bronze and coral.
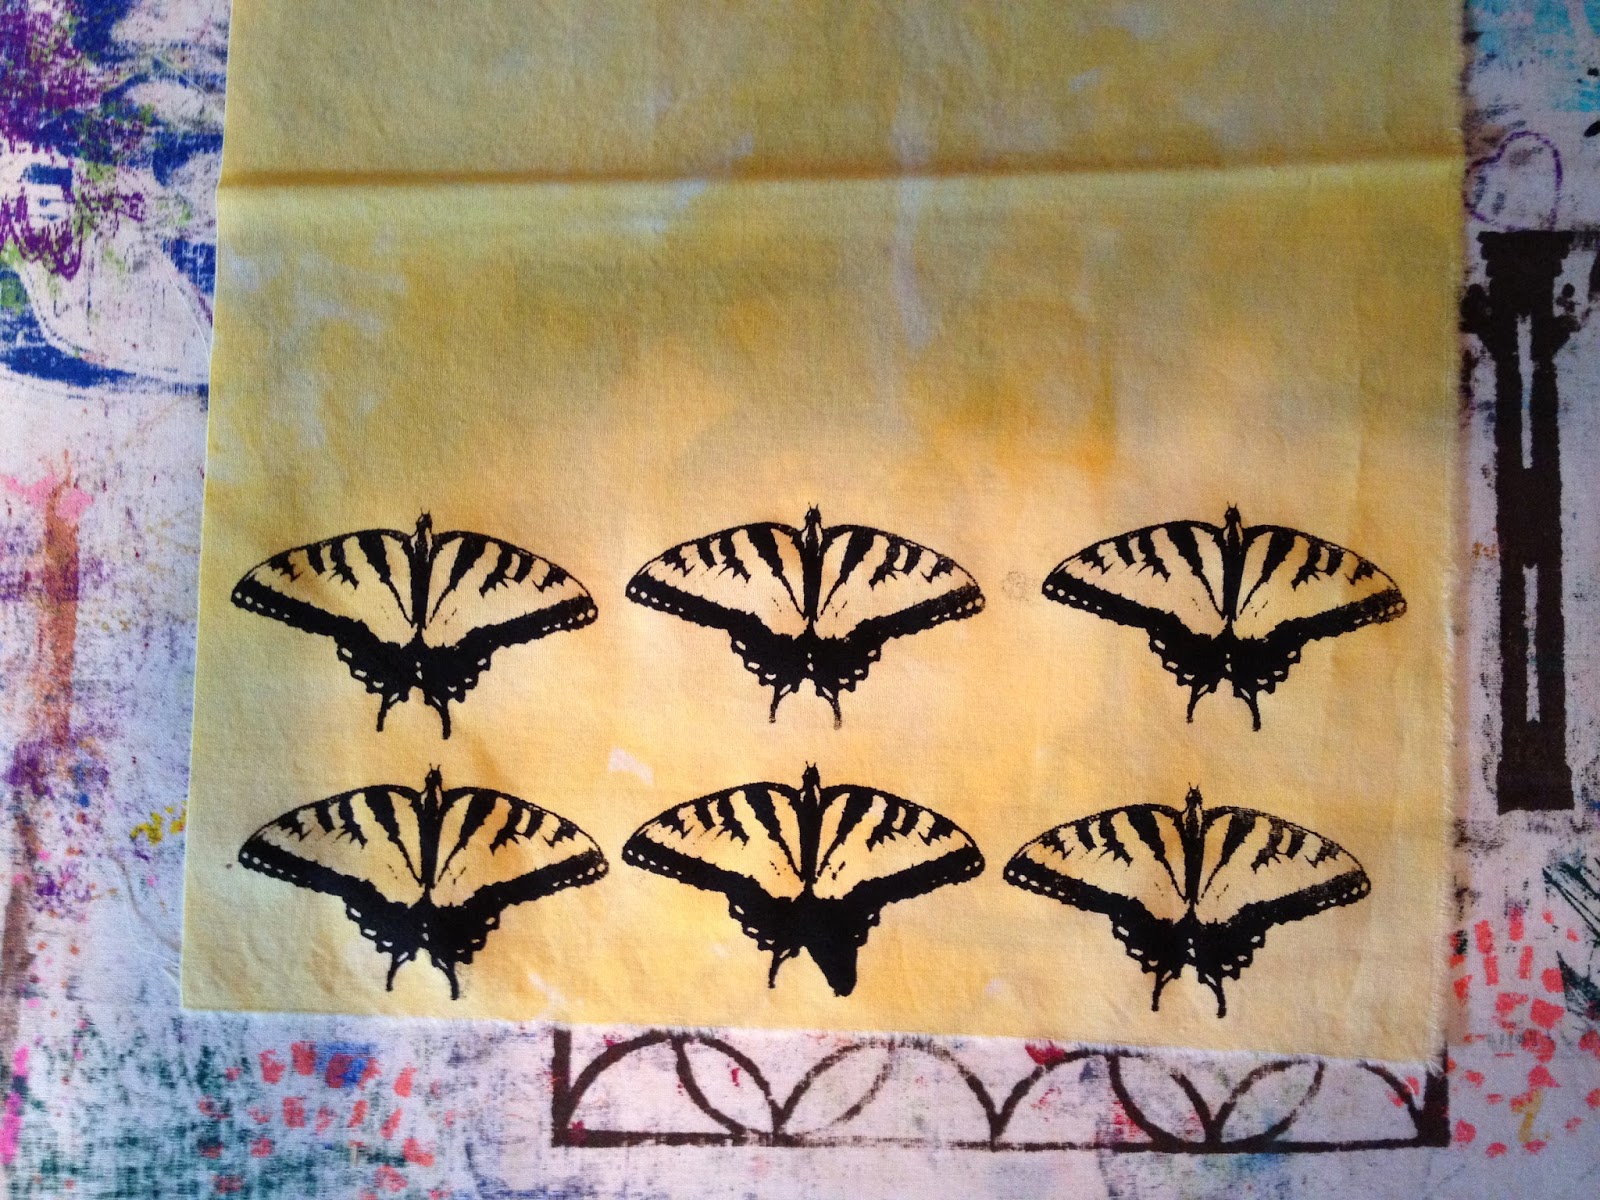
I mixed up about 1/2 cup of dye concentrate of each color, although the bronze was less concentrated because I didn't have much dye powder left.  That's why you don't see much of it in the finished piece.  I actually used only about 1/2 to 3/4 of the concentrated dye for the snow dye, so ended up soaking some fat quarters in soda ash to use up the rest of the dye solution.  That's what's in the containers below.  These are each of the 4 individual colors.  They still need to be washed out.
Below are the results of the 2 half yard pieces - coral/bronze and blue/grey.  What I love about snow dyeing is how the melting snow causes the colors of the dye to separate and makes such interesting patterns.  What you get is (mostly) always a fun surprise!


Tuesday, January 6, 2015

Seed Pod Screen

Yesterday I showed I picture of a seed pod that I tried using as a stamp.  It didn't work very well because it wasn't flat, but I expected that.  So today I drew in the missing parts of the print and made a thermofax screen out of it. 
I also had some other screens I was taping as well.  I made two screens of the seed pod - one with the outline and one without.

I think both have possibilities

Monday, January 5, 2015

Getting Started

I'm still refining the list of projects and new endeavors for 2015, but getting closer to specifics. I'm also focusing on this quote from Lesley Riley " Learn to observe the ordinary. That's where you'll find the answers." This, and my word "clarify", and we'll see how the year evolves. I've got a list of UFOs, and a list of ideas.
 Meanwhile, I've worked on one UFO (Winter Oaks that I showed in this post) and started testing some ideas for another project. Here are a few things I played around with today.
The top photo above is a piece I started printing last fall, but needed to let the paint dry before I filled in all the spaces - and then didn't get back to it.  So today I decided it was time to finish filling in the spaces.  Then, I played with the things below.  On the left is a seed pod that I saved from a flower arrangement.  I thought it would make an interesting stamp, although it's not flat so I knew that would make it hard to get a complete print.  But there is potential there....stay tuned.  On the bottom right are some prints from a wooden stamp that I was trying out.  I like it.
And finally, I did some discharge on a piece of hand-dyed fabric to see what color it would discharge to and if I like the results.  I'm considering some options for a small project I want to do this month.  Well, its a start!

Thursday, January 1, 2015

Customer Work

In early December we had an order for custom screens from a potter named Arline in Connecticut. This week she contacted us to order more screens as she was pleased with the results.  She was kind enough to share some pictures of her work, although she sells mainly at a local outlet in Connecticut.  Perhaps in the future she will have an online source for her work.  Pretty cool!