Showing posts with label ice dyeing. Show all posts

Saturday, January 31, 2026

Snow Day = Snow Dyeing

 Do you have Snow?  (or Ice?)

Since 2015, according to this blog, Sue and Elizabeth have been snow dyeing at their homes during winter snowstorms.  While they haven't done a lot lately because, frankly, they had plenty of snow dyes in their stashes, we see that many people are newly interested in this technique.  So, we thought you might like to review some of our past experiments and make your own snow dyed fabric.

Snow dyeing takes a bit of preparation before the snow falls or after if the roads are clear to get supplies and the snow is staying around.  You will need fabric (preferably PFD - Prepared for Dyeing), soda ash and your dye-powder.  MX Procion fiber reactive dye seems to work best.  We get ours from ProChemical and Dye or Dharma Trading Company but there are other sources too.  Tulip brand from a craft store or other powdered dye will also work but need to be used quickly once water (snow) is added as that is when the soda ash, which is included in the dye is activated.  If you use MX Procion dyes you can soda ash the white fabric and hang to dry, then use it as you go.  We have saved dry soda ash treated fabric for many months and then used it for dyeing.  We do store it in a plastic bag.

Since you are on this blog page and ready to experiment with snow dyeing, look to the right for the box labeled "Search This Blog" and type in "snow dyeing".  All the blog posts we have written about snow dyeing should come up.  You can also search for "ice dyeing" which is very similar.  There are a lot of experiments from over the years to include using liquid dye or dye powder, combining of dyes or single color from the store, as well as advice on how to set up your space for dyeing since it is inside your home and you do not want to dye your floors, walls, or bathtubs!

We hope you get some snow dyeing done this winter.  Please let us know if you do.  You can also follow us on Facebook at PGFiber2Art.  

Here is some inspiration of a snow dye that has had our Valentine tic tac toe thermofax screened on it.


Wednesday, September 1, 2021

Quilt Camp Day 7

Day 7 was busy with lots of time spent washing out dyed fabrics and another round in the indigo pot.

Another ice dyed t shirt for Molly but this time the dye is on top of the ice instead of under it.  Watch for the results in a few days.  Two blends of yellow and one of red.


After refreshing our indigo bucket, we did quite a number of indigo pieces today, many of them over top of other techniques such as "not so stellar" dyed pieces and some over rust too.  It feels like a very satisfactory way to improve those dud pieces you sometimes end up with.


Along with washing out some dyed pieces and the indigo above, Sue also did  another sun print and cyanotype prints.

Molly got a new shirt with hand drawn ginkgo leaves screen printed around the hem and on the pocket.  It was ice dyed with a color called Marine.


Molly sure does like watching the sun set.


More fun things to unveil tomorrow.

Tuesday, August 31, 2021

Quilt Camp Day 6

We were saying to each other today that it doesn't seem like we get as much done these days as we once did!  What's up with that?

If our math is right, this is the tenth time we have had quilt camp.  The number of years is higher  because we had a few years when we couldn't get together.  Probably somewhere around 14 years we have come to the garage here at Merrymount on the shores of Lake Winnipesaukee to stir our creative juices and work on our business selling Thermofax screens through Etsy and promoting them on social media.

Today Elizabeth rinsed out the excess dye from this lovely vine flower Thermofax screen done with Color Magnet and Coral MX dye.


And her pole dyed piece.  Not sure why this year the white lines from the string isn't as prominent.  Perhaps oversoaked, not wound and scrunched tightly enough or too few layers on the pole.  It is still ok, just a faint glimpse of texture.


You saw a sneak peek at Molly's new shirt the other day on the blog but not the vine flower around the hemline.  The t-shirt was first screened with the design using Color Magnet, left to dry and then ice dyed.


Elizabeth also screened this hand drawn ginkgo leaf, onto a long piece of previously dyed fabric, using a blue acrylic fabric paint which sparkles just the slightest amount.


And this green piece was screened with a new screen made from a photo of birch bark.


Sue has some pieces that didn't get included in yesterday's post.  One is this piece of rusted fabric that was folded and dipped in the indigo pot.

In an effort to make some ugly fabrics more palatable, they were also dipped in the indigo pot.  The left photo is "before", the right photo is "after".  A small step in the right direction.  Looks like another dip in the indigo pot is called for!

We didn't have much sun today, but there was enough to put out a quick sun print with some stencils.

The best ending to the day was that Bob drove us to Wolfeboro and treated us to an ice cream at Bailey's Bubble.


Tuesday, November 24, 2020

Personalize Your Face Masks

Here it is November and many sewists have spent time making masks these past 9 months as we try to lessen the impacts of this global pandemic.

This summer, Elizabeth ordered some premade cotton-knit 2 layer face masks and dyed them using the ice dyeing techniques we have talked about before.  Search the label ice dyeing on this post to see old posts where we mentioned ice dyeing.


After dyeing some masks she got to work using thermofax screens to add images.  She tried adding an owl from our collection which had previously worked well on a woven cotton but found that it was too detailed and just looked blob-like on the knit mask fabric (top left)  Since less detailed images seemed to work best she tried some of the screens in our collection which were hand drawn and had thicker lines.  She was also particularly pulled to the words that could be added either alone on a mask or over top of another image.  


As these masks were premade and included some gathering around the edges it wasn't always easy to get the image into the space without a wrinkle or two.  This was exacerbated by trying to use the screen a second time once paint was blocking the view of the image.  Thus, she did a lot more screen cleaning than normal. Screening fabric first and then sewing the mask is an alternative if you sew.

If you have a simple line drawing you think might look good on a mask, send us the image sized for the small screen and see if you can make your own personalized mask.  This cardinal came from the Graphics Fairy, a free source for vintage, public domain art work. 


This is a dragonfly that Sue drew on a piece of paper with a black pen.  We can make a screen from your drawing so long as the image is black and white.


A favorite is when you can screen two images and have one as a foreground and one as a background such as these daisies and then add a sentiment or positive word on top.


Different fonts will give you different looks so play around and see what words you can fit in the size of the mask you are using.  There are so many to choose from just in Microsoft Word alone.  Above, the word "Flourish" is in a font called "Casteller". Most of the fonts we used are in the range of 65-120 font size but that would depend on the length of your word and the size of the printing space available on your mask.  Enjoy personalizing your mask with your own work.  We would be happy to help you.  Visit our Etsy shop to see our screens and order a personalized screen. Right now there is a 20% off sale through December 3, 2020. 


If you use a word though, by careful when you put your mask on because you might be walking around with your mask on upside down!  How embarrassing is that?


Wednesday, September 30, 2020

Quilt Camp-Week 11 Sometimes your creative journey takes you in a different direction

Last week, Sue wrote about how she revived her original idea for using our new screens in a project to benefit the Virginia Quilt Museum by adding variety to her 9 patch squares.

Elizabeth also tried to make a 9 patch but took the path of a quilt-as-you-go with a leaf quilt design.  Her plan was to fuse applique her fall inspired leaves to the block after the quilting and then stitch them around the edges.  What happened?  After making a few trial blocks she decided the leaves were too small for the blocks,   Also, the leaf designs, while lovely and some of our best selling screens, are not the new thermofax screens we hoped to showcase for you.  The bark screen was the intention for the 9 patch.  


After seeing Sue's dyed fabric, Elizabeth remembered this spiral ice dyed piece and it reminded her of the fall through the skylights here in her house in New Hampshire.


Taking the spiral as a whole piece, she laid out her fused leaves in a circular pattern and then still thought, nah, this isn't working.  That happens some times when making an art quilt and we have to give ourselves permission to put it aside and go create something else.


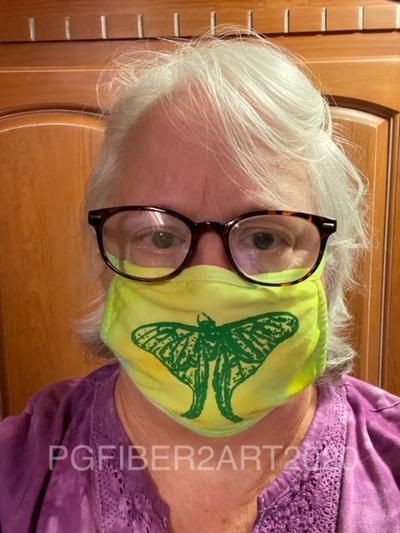
A few warm early fall days were arriving so she went back to ice dyeing some masks. Maybe she will return to the other ideas on another day?  On some lime green/yellow ice dyed combinations the new Luna Moth was printed with fabric paint.


One of our new screen options are words.  We will burn screens of your choice of words and you can use them in your fiber, paper, clay, or other surfaces that will take a paint or thickened dye.  Elizabeth made these masks using some screens she had on hand.  Wouldn't "smile" be a great one to use?  Smile is one of our new word screens.  Bloom seemed like a good choice also.


You can find the luna moth and word screens, as well as all our other designs, in our Etsy shop.  We are also happy to make custom screens from your images.  Don't forget our fall sale runs through Saturday, Oct. 3. Use code SEPT2020 at check out for a 15% discount.

Wednesday, July 29, 2020

Quilt Camp 2020 Week 3 - Color Magnet

Do you dye your own fabric?  Have you tried Color Magnet?  Color Magnet is a dye attractant.  If you make marks on fabric with this product and allow it to dry before dyeing, it will attract more dye to those areas producing a two-tone effect.  In week 3 of our virtual quilt camp we used Thermofax screens with Color Magnet.
The first step was to soak the fabric to be used in a soda ash solution and then allow it to dry.  The soda ash bonds the dye to the fabric, so you must either pre-soak the fabric, or add the soda ash to the dye.  A 20 minute soak is all that is needed.  After the fabric is dry, print your image onto the fabric. You can see that the color magnet is yellow.  It is also thinner than the paints we typically use.  A little bit goes a long way!
For her sample Sue used a screen of Queen Anne's lace and azure blue dye. She used a low water immersion method and let the fabric batch for 24 hours before rinsing and washing. 
Enlarge the photo above to better see the results.  The azure blue turned out darker than anticipated so the color magnet prints are less obvious in this small photo.

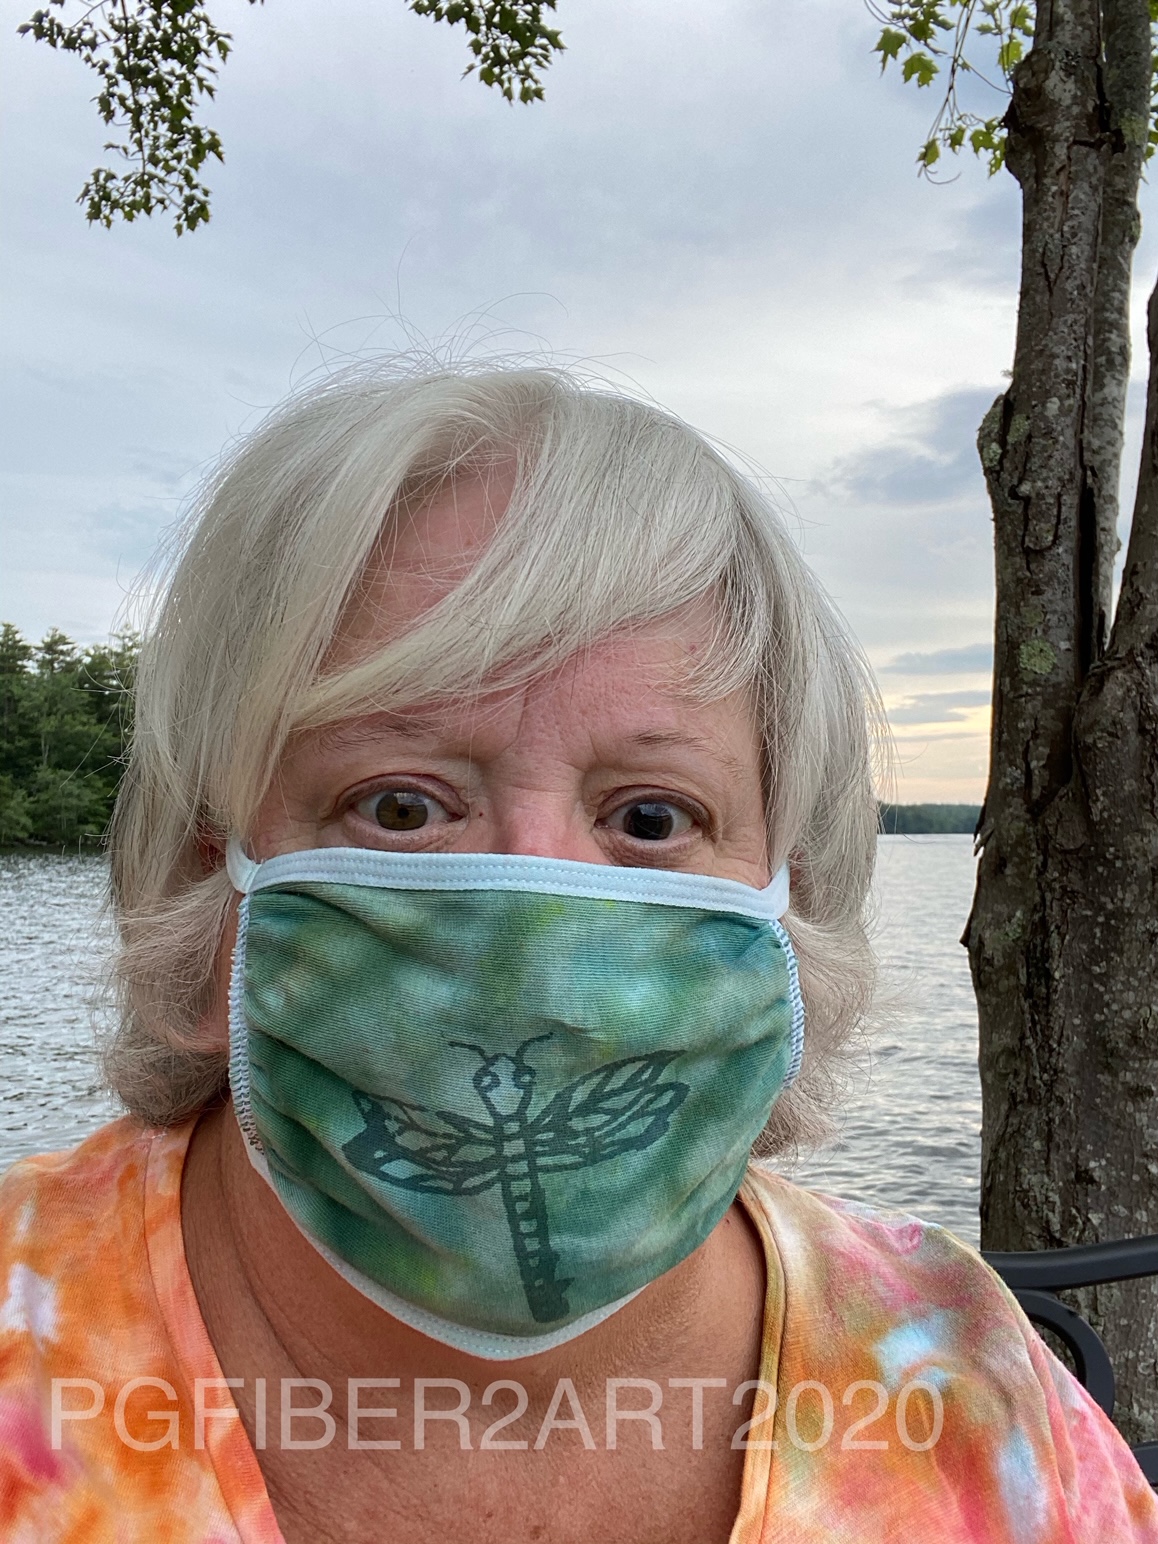
Elizabeth's project was a cotton face mask which she printed with a dragonfly screen.
After allowing it to dry she dyed it green using an ice dye technique.  (See our tutorial on ice dyeing for more info.)  Here you can clearly see the effect of the color magnet.  Quite the appropriate face mask for life on the lake in New Hampshire.

Sue decided to try a few more pieces, this time she used the ice dye technique with coral dye.
The results are below. One piece was directly under the ice (on the right), the other was in the pan below to catch the drips (on the left).
The piece on the left has a crackle pattern, the one on the right has a rectangle pattern. And below are a few pieces from a previous dyeing session. That coral seems to be a favorite color!
You could also use color magnet with stencils to create a pattern before dyeing,  It is available in a pen form as well, so could be used for writing words or drawing designs.  If you enjoy dyeing fabric, this is a fun product to play with to create pattern in fabric. 

Wednesday, July 22, 2015

More Ice Dyeing and New Thermofax Screens

While Elizabeth was busy with her ice dye experiment, Sue did some ice dyeing of her own.  She brought along some previously dyed pieces for over-dyeing, so decided to see if she could improve them with ice dyeing.  One piece was an uninspiring light green, and the other was a pretty ugly brown with some patches of dark blue.  Of course, she forgot to take "before" pictures.
 Here's the set up of the two trays, with the soda ashed fabric under the ice.
 The pale green fabric got azure blue and kingfisher blue dye.
 The ugly brown got 3 colors - black cherry, deep purple and elephant grey.
The "ugly brown" above is greatly improved.  Most of the brown is transformed, and the odd blue streaks even add a bit of interest.
Likewise, the formerly green piece, now blue-green, has a really lovely texture from the ice.  She is much happier with these two transformed pieces.

In addition, we have made 3 new thermofax screens which will be added to the shop soon - a 5-leaf stem, an ancient pine,  and a berry branch.


Come back every day for more quilt camp adventures in surface design!

Monday, July 20, 2015

Ice Dyeing Experiment


For the past two years, Elizabeth has been following a Facebook group called "Addicted to Tie Dying" - note the misspelling of dyeing in case you want to try it out.  The members there do some snow and ice dyeing and have been discussing the merits of tying their project dry after having soaked it in soda ash versus wet and wrung, right out of the soda ash soak.  As well, they have been discussing placing the dye on top of the ice or under the ice.

Elizabeth thought it would be interesting to do her own experiment with both options.  However, being excited to begin, on the dry piece she totally forgot about the soda ash soak and dry part!

The wet experiment was done correctly having been soda ask soaked.  She used a hemostat to twirl her fabric into rosettes and bound them loosely with a rubber band.
Let’s call them 3 and 4 across the top row from the left to the right and 1 and 2 on the bottom row. 
3 and 4 were wound dry and 1 and 2 were wound into rosettes when damp from the soda ash soak.  She wanted to see if dyeing dry or wet gave better results.  Rosettes 2 and 4 had the dye powder sprinkled directly on the fabric and the ice over the powder where 1 and 3 had the ice on top of the fabric and the dye powder on top of the ice. 
Unfortunately, she used some bad experiment practices and will need to try again.  She messed up by not soaking her dry samples in soda ash so it would be difficult to say if tying while wet or dry and then dyeing made any differences.  She would need to repeat this to get true results and have all four pieces treated with the soda ash.

She used the very traditional design of splitting a swirl into thirds and using the three primaries, yellow, blue and red in each pie shaped wedge of the circle.  It was difficult to really know where the circle was once covered with ice so she did a lot of guessing (something else that isn’t good practice in an experiment).  She also decided to allow the pieces to sit in the dye liquid (called muck) while they did their 24 hour ”batch” time.   
Mixing the primaries pretty much makes brown and so some of the pieces ended up with some nice brown striping radiating from the middle.  It is always amazing that a rolled piece of fabric with pie shaped dyed wedges makes such a pretty spiral and that sitting in muck (or adding black dye to the top of the circle gives radiating lines.  As far as dye under or over the ice, here are pictures of the results so that you can judge for yourself. 
They hang 1,3 and 2,4 on the clothesline.   It seems that dye under the ice gives a more crisp and clean look to the finished product where dye over the ice gives a more muted and crystal like effect.  Yellow dye is notorious for not “striking” - the term used to mean that it bonds to the fabric and you see the color.  You can see that in number 4 there is no yellow showing even though it was applied.
More experimentation is required, perhaps limiting the number of variables to start.  Stay tuned for more quilt camp experimentation.