Showing posts with label low water immersion. Show all posts

Wednesday, July 29, 2020

Quilt Camp 2020 Week 3 - Color Magnet

Do you dye your own fabric?  Have you tried Color Magnet?  Color Magnet is a dye attractant.  If you make marks on fabric with this product and allow it to dry before dyeing, it will attract more dye to those areas producing a two-tone effect.  In week 3 of our virtual quilt camp we used Thermofax screens with Color Magnet.
The first step was to soak the fabric to be used in a soda ash solution and then allow it to dry.  The soda ash bonds the dye to the fabric, so you must either pre-soak the fabric, or add the soda ash to the dye.  A 20 minute soak is all that is needed.  After the fabric is dry, print your image onto the fabric. You can see that the color magnet is yellow.  It is also thinner than the paints we typically use.  A little bit goes a long way!
For her sample Sue used a screen of Queen Anne's lace and azure blue dye. She used a low water immersion method and let the fabric batch for 24 hours before rinsing and washing. 
Enlarge the photo above to better see the results.  The azure blue turned out darker than anticipated so the color magnet prints are less obvious in this small photo.

Elizabeth's project was a cotton face mask which she printed with a dragonfly screen.
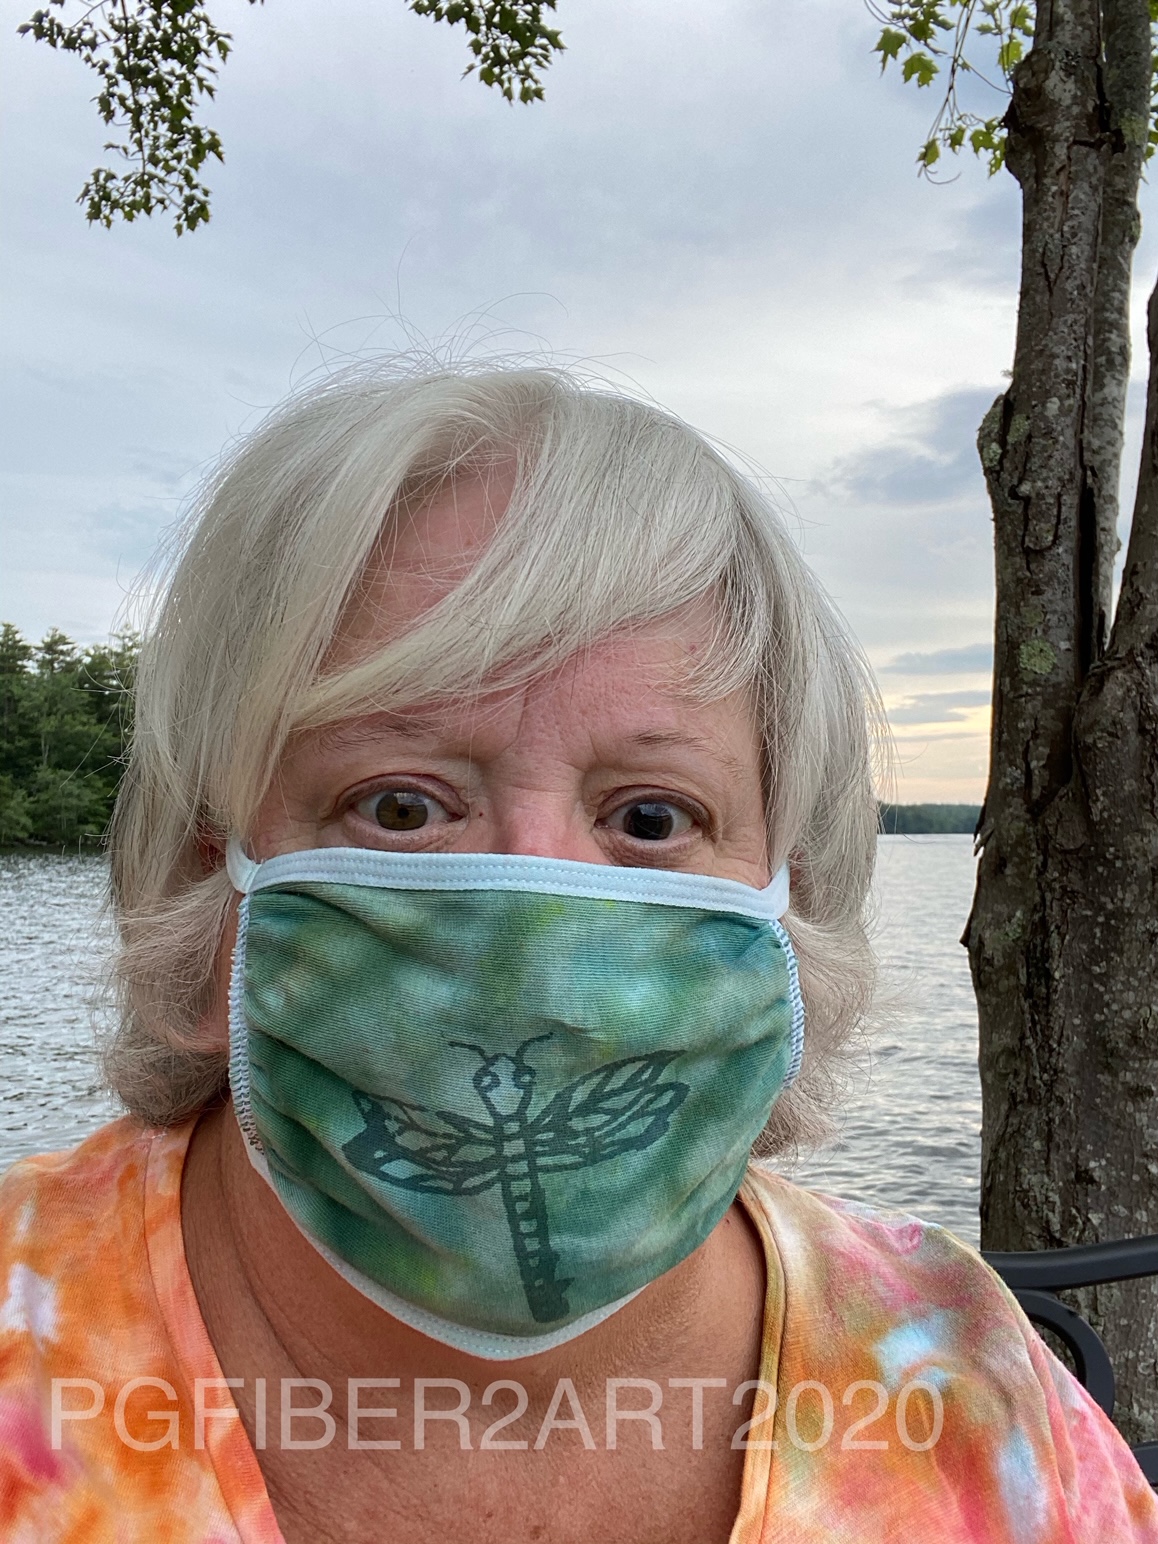
After allowing it to dry she dyed it green using an ice dye technique.  (See our tutorial on ice dyeing for more info.)  Here you can clearly see the effect of the color magnet.  Quite the appropriate face mask for life on the lake in New Hampshire.

Sue decided to try a few more pieces, this time she used the ice dye technique with coral dye.
The results are below. One piece was directly under the ice (on the right), the other was in the pan below to catch the drips (on the left).
The piece on the left has a crackle pattern, the one on the right has a rectangle pattern. And below are a few pieces from a previous dyeing session. That coral seems to be a favorite color!
You could also use color magnet with stencils to create a pattern before dyeing,  It is available in a pen form as well, so could be used for writing words or drawing designs.  If you enjoy dyeing fabric, this is a fun product to play with to create pattern in fabric. 

Wednesday, June 24, 2020

Dye Day

Last week Sue participated in a socially distanced dye day at Artistic Artifacts.  The class was limited to 7 and each participant had their own 6 foot table, their own supplies, and masks were required.  The method of dyeing employed was low water immersion, done in quart canning jars.
Judy prepared the dyes for everyone; we started with 3 colors - turkey red, mixing blue and sun yellow.  Each person had a pan holding soda ash water to soak our fabric pieces in, and a jug of plain water. Soda ash acts as the fixative to bond the dye to the fabric.
We started with a layer of fabric in the bottom of the jar, then added a quarter cup of the dye concentrate mixed with a quarter cup of plain water. Then another 1/4 cup of soda ash water was added. On top of that, we placed layer 2 of fabric followed by another color of dye and soda ash water, then layer 3 on top of that.  Six jars were assembled with the first 3 colors of dye. Then we were provided 3 more colors - turquoise, fuchsia, and orange. Some yellow and butterscotch were also available.
A total of 11 jars were assembled with fat quarters of fabric, handkerchiefs, doilies, laces and trims.
Above are some of the handkerchiefs.
This group of fat quarters are probably the least successful.  Lesson learned: its probably best to stick with just 2 colors in one jar. Either that, or make sure each layer fills the width of the jar, so there is less  travel of the dye between layers.  Some of these may get some discharge treatment (taking color out) or over-printing.
The top 2 in this photo combined fuchsia and orange.  The bottom 2 combined orange and butterscotch.
In this photo, the top 2 pieces were in the bottom layer in 2 different jars and were folded in accordion pleats.  Both contained the red, blue and yellow dyes,, but in different order.  One had blue as the bottom layer, and the other had red as the bottom layer.
Top 2 were in red/blue/yellow jars.  The bottom 2 were in turquoise/fuchsia combinations.
The bottom 2 here were also in fuchsia and turquoise. The top 2 were a combination of turquoise and yellow.
While all the other fabrics are 100% cotton, these last two are a cotton/silk blend. They were middle layers in the red/blue/yellow jars.  They are actually rectangular but because of the blend, the corners curl up.  The fabric has a really nice sheen to it; in hindsight, Sue might have preferred to dye these by another more controlled method.  

There are also some other handkerchiefs and trims that unfortunately turned out pretty dark.  Those pieces are additional candidates for discharge or other method of color removal.  We'll be sure to share photos when those results are available.  That is the serendipity of this method of dyeing. Some pieces turn out great, others less so. But with more practice and careful consideration of color combinations, results are sure to improve.  The next dye day on June 27 is sold out but there is another on the calendar for August, and an indigo dye day in July.  You can find the class calendar here.