Showing posts with label shibori. Show all posts

Monday, July 3, 2023

Blue Ridge Heron

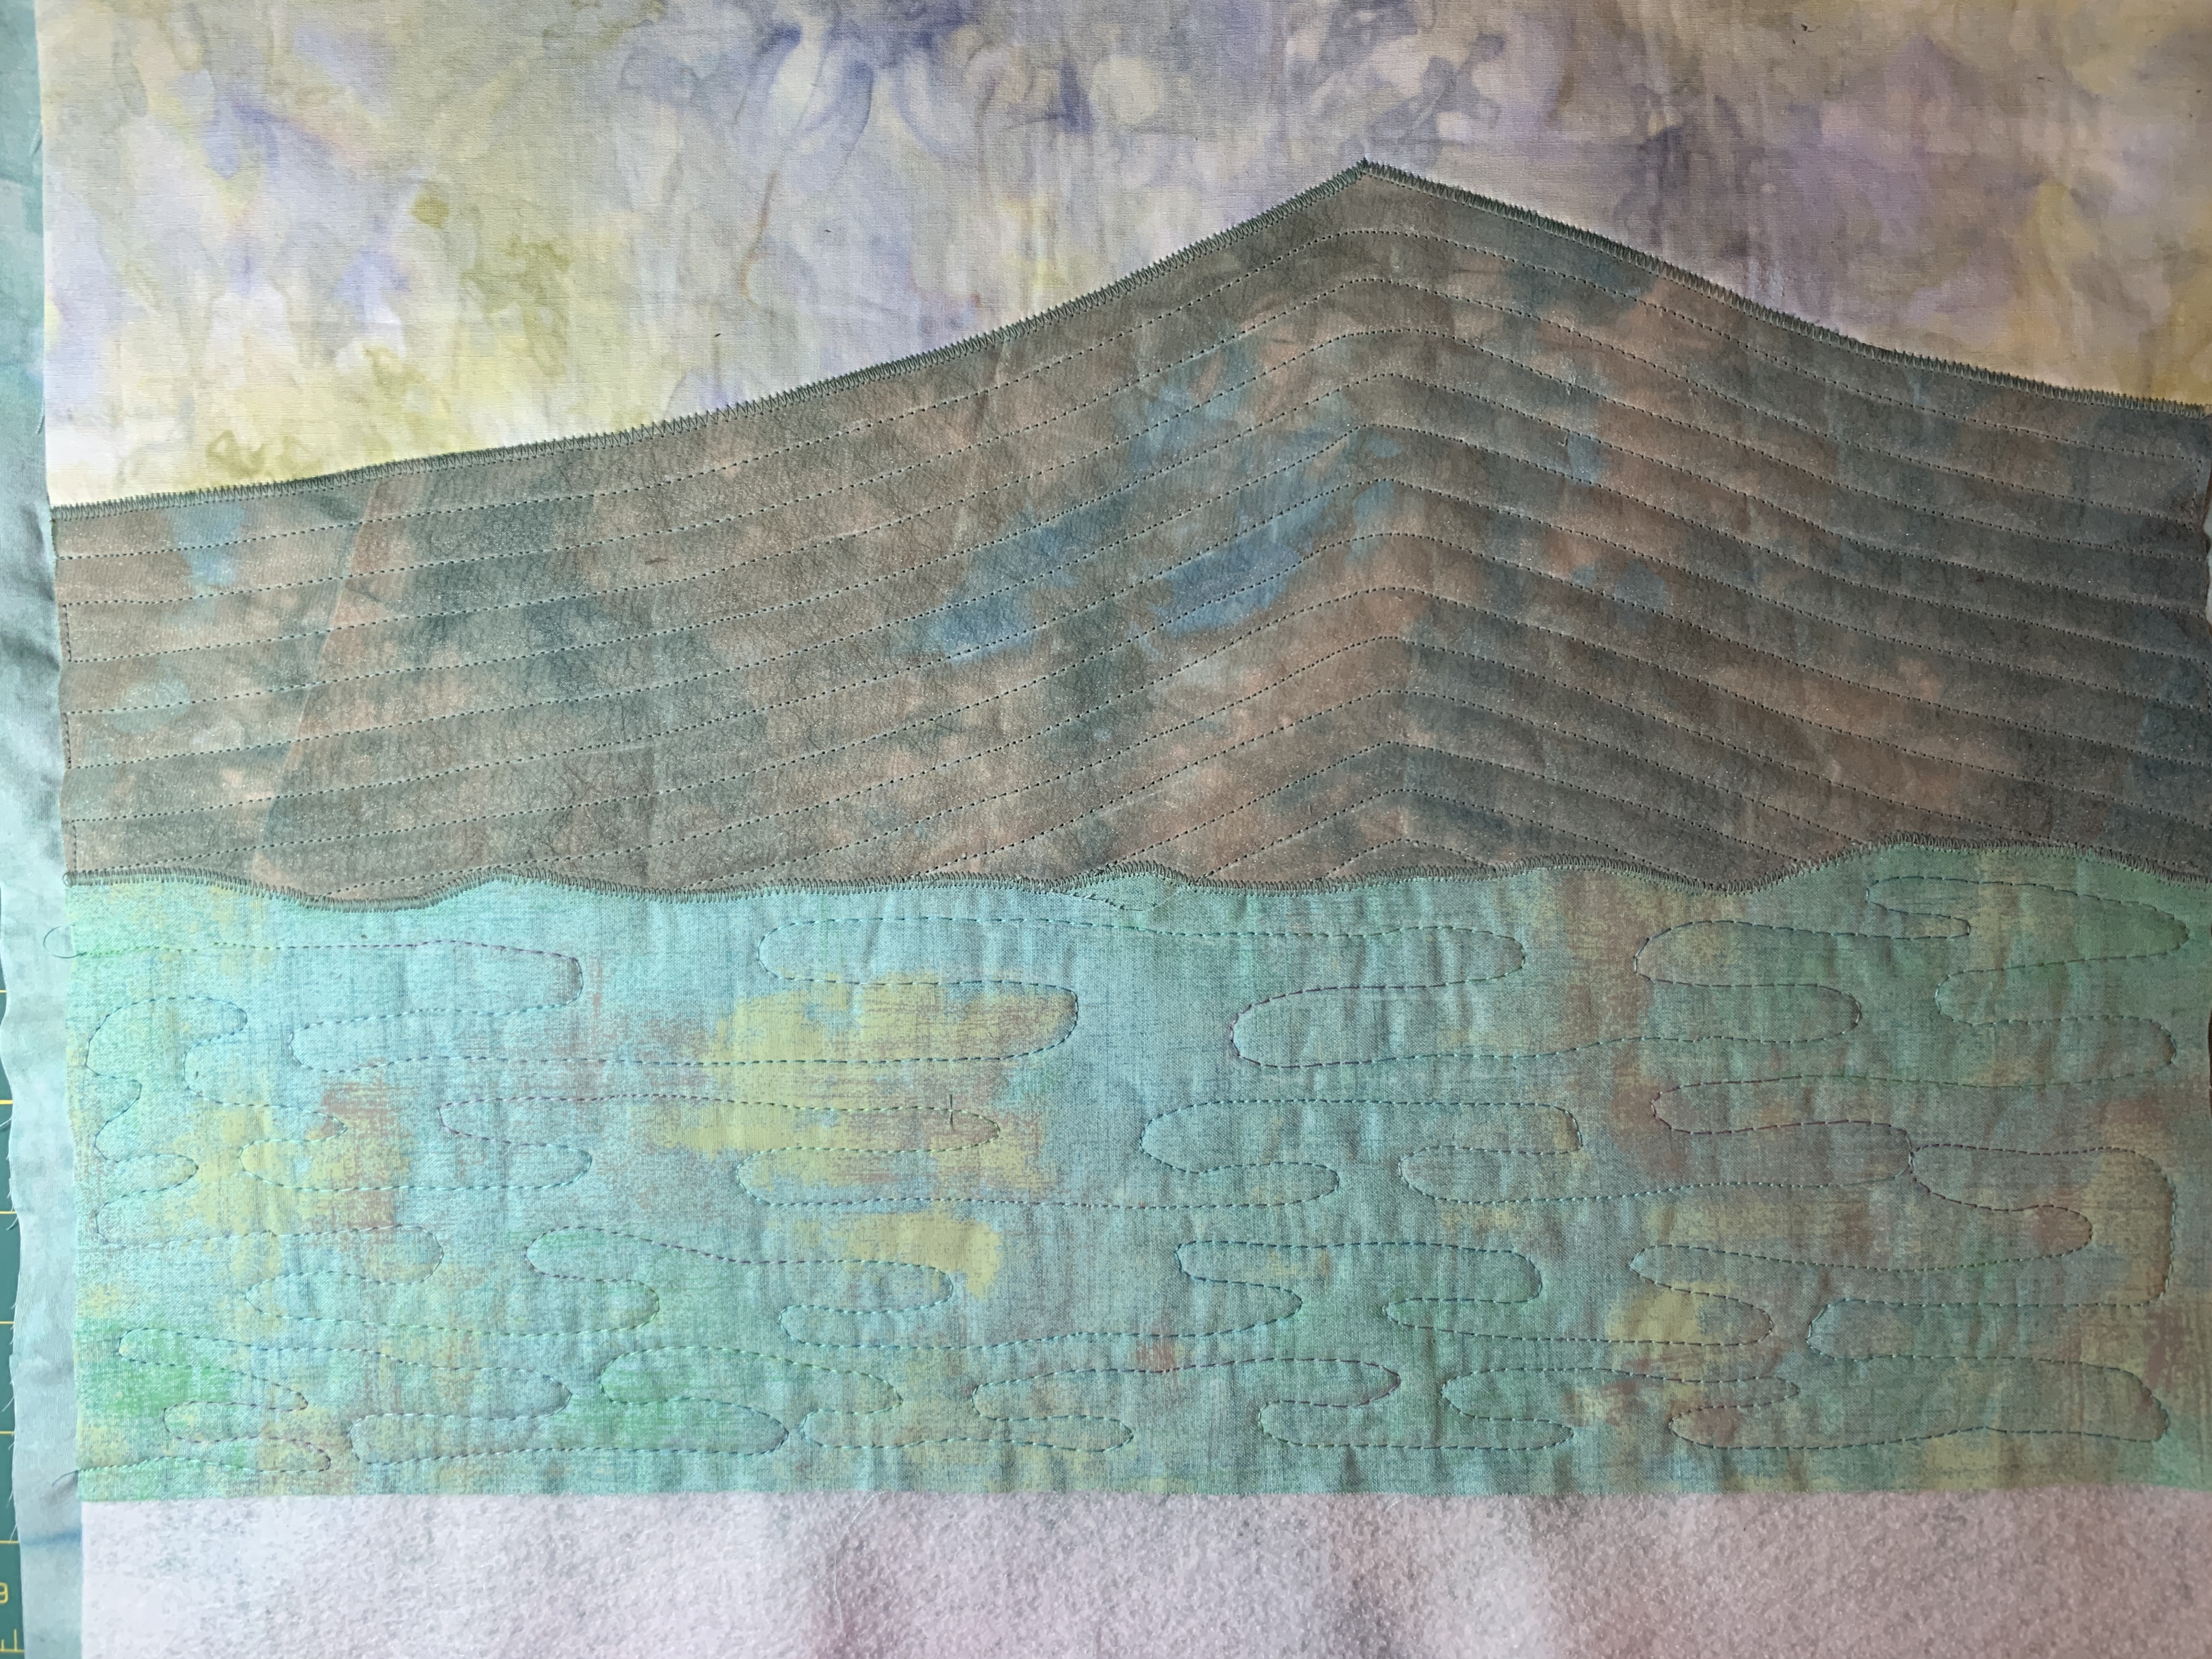
The SAQA Regional Group of North Carolina and Virginia has mounted a new exhibit called Reflections that will debut at the Petersburg Area Art League in Virginia on July 7 and remain through August 5.  These quilts depict the rich and diverse worlds of Virginia and North Carolina including colors, shapes, textures, natural environments, structures and cultures.  Sue created her Blue Ridge Heron (18" square) for this exhibit.

The basis for this quilt is two photos that were taken at Peaks of Otter Lodge along the Blue Ridge Parkway in southern Virginia. The 2 photos were blended with an app called Image Blender to create the pattern for the quilt.


Sue started by building and quilting the background on a foundation of fusible fleece which serves as the batting.  Simple shapes and quilting were enhanced by fabric selection.  The mountain has a layer of organza fused on top to mute the colors. 


Next, the heron was added by fusing and then doing a machine satin stitch around the edges.


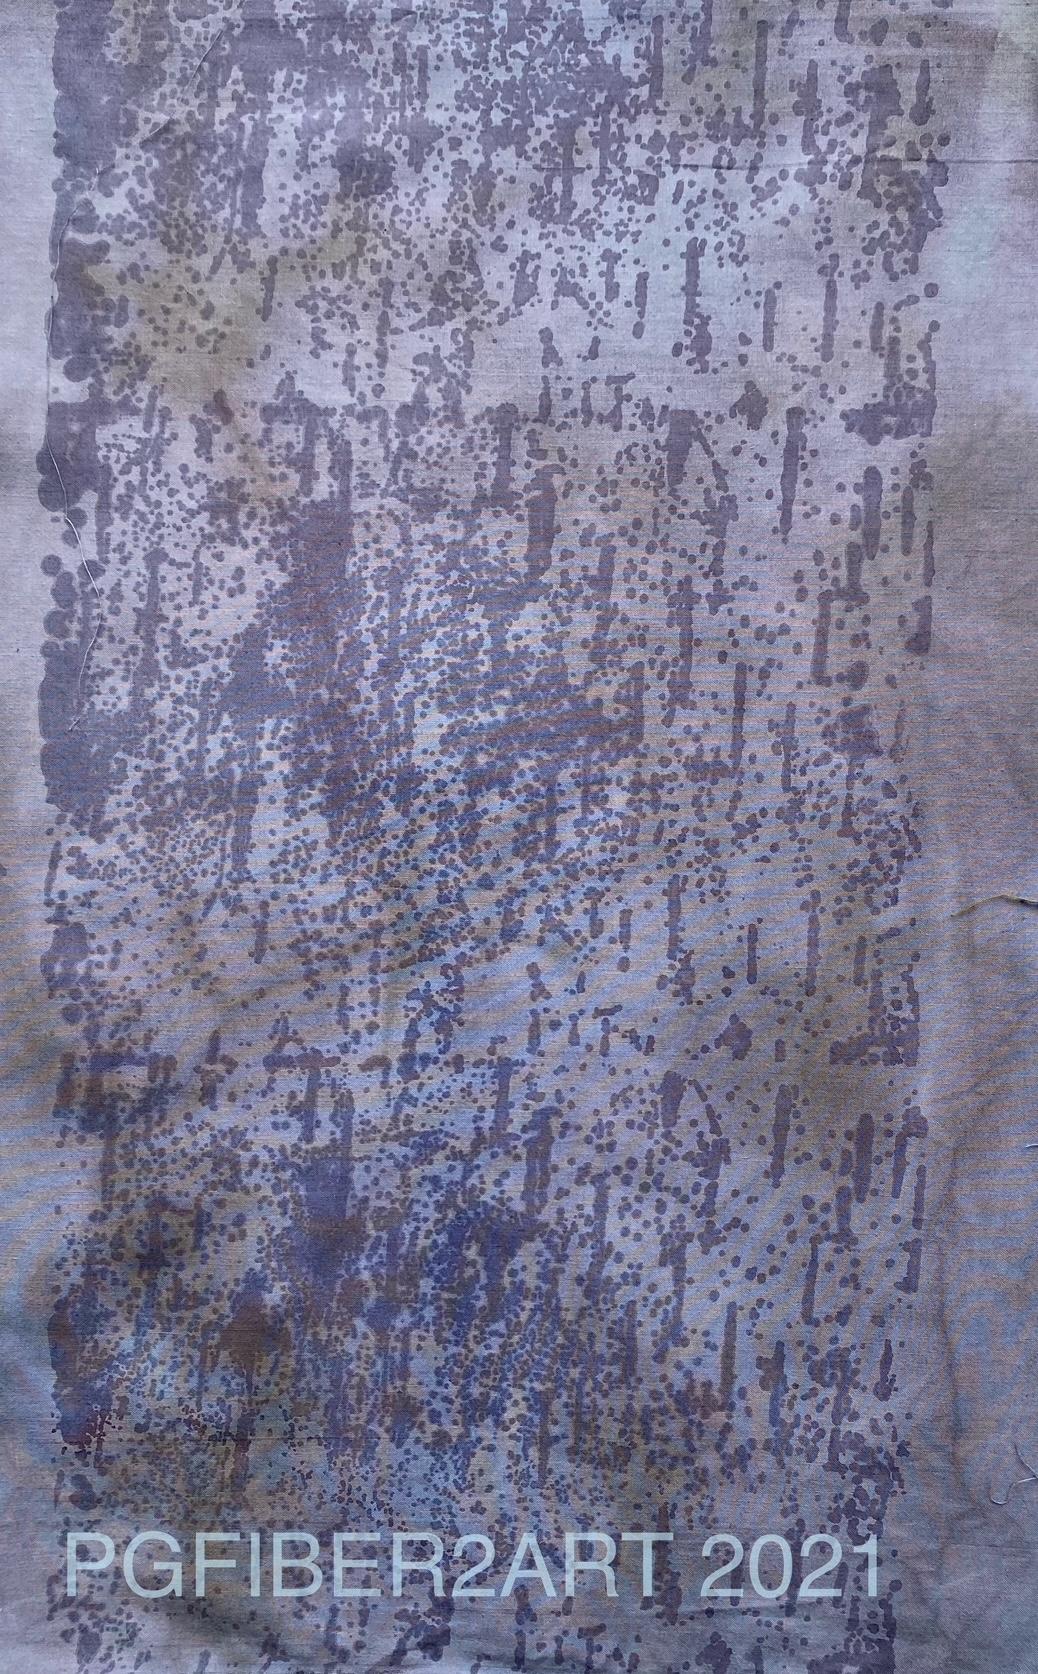
The next step was adding the grass and tree shape on the left.  The grass was created from a piece of shibori fabric made by Vicki Welsh of Colorways by Vicki.  (See second photo below.)  Vicki featured this quilt on her blog on July 2.


Sue started with a strip of the fabric, applied a fusible product to the back, then began cutting away the lighter parts to create the grass effect.


You can see this and the other wonderful quilts in the exhibit at Petersburg Area Art League beginning July 7.  Other venues will be announced when they are known.  

Monday, June 26, 2023

SAQA Benefit Auction

Each fall, Studio Art Quilt Associates (SAQA) holds an art quilt auction as its main fund-raising event. Proceeds support exhibitions, publications, and educational outreach. Twelve-inch square quilts are made and donated by members and then auctioned in an online event over a period of 3 weeks in September/October.  Sue recently completed and sent in her donation.

"Filtered" was made from scraps of shibori/indigo and rusted fabrics along with a cyanotype printed on a flattened coffee filter.  Both hand and machine stitching were used to quilt and embellish.


Here is the background prior to adding the cyanotype where you can see the various fabrics used, all leftovers from previous projects.


Portions were quilted with straight line machine stitching.  Other parts were enhanced with hand stitching.


Above you can see some of the hand stitched circles and a row of fly stitches across the bottom. You can also see the machine stitching that outlines the cyanotype print and a blanket stitch used around the edge.


Here is the backing with corner triangles for hanging, or alternatively a ribbon loop in the center.


And the finished piece.  Watch this blog and our other social media for notice when the auction takes place this fall.  Bidding is open to anyone.  There are always many fabulous pieces of quilt art available.

Monday, April 24, 2023

Quilting Arts TV

Are you familiar with Quilting Arts TV? As a long-time subscriber to Quilting Arts magazine and owners of many DVDs on various quilting and surface design techniques, we're happy to report that it is now possible, depending on where you live, to view current episodes on public broadcasting television. If you cannot find it showing in your area, you can also subscribe to the online version, or choose to purchase a particular series that you may be interested in.  Which brings us to the most recent series, season 2900.  The shows are hosted by Susan Brubaker Knapp, and she is joined by Vivika Hansen DeNegre to share artwork from the Quilting Arts community. 

Series 2900 includes segments with 11 quilt artists including Lea McComas, Margaret Abramshe, Luana Rubin, and Denise Labadie with topics ranging from color to surface design to applique. A unique feature in this season appears at the end of every episode, called Finishing Touches.  Here Susan and Vivika chat about several pieces from the Quilting Arts community that were submitted to the magazine's Readers Challenges.  

Sue has participated many times in the challenges and has had several pieces selected to be published.  In early 2022, past participants were invited to submit to a special challenge just for those whose work was previously published, and the selected pieces are the ones featured in Finishing Touches.  

Sue was delighted to see her piece "Serendipity" featured at the end of episodes 4 and 11, and to hear the comments and discussion between Susan and Vivika regarding her quilt.  


This piece evolved from an "ugly" hand-dye that was overdyed in indigo and became the result you see here, thus the title "Serendipity". The official description of the process is as follows:

Indigo fixes everything!  This quilt started with a rather ugly hand dyed fabric that looked like a brown and white spotted cow.  Last summer my friend and I had an indigo pot going so I decided to overdye it in hopes of improving it.  After accordion folding and clamping plexiglass circles on the outside, it went in the pot.  The outside layers directly under the circles came out great, but the middle was still uninteresting.  So, I cut off strips of the circles, refolded the rest and dipped it in the indigo pot again.  Voila!  Now it looked like art.  I added an original design Thermofax spiral print on the brown circles and echoed the circles across the center, doing all the quilting with hand stitch.  


The photos above show the original ugly fabric, results after 1 dip in the indigo pot, and final configuration after a second dip in the indigo.  It was a great exercise in creativity and "going with the flow" of unpredictable results.  


Above is a detail shot of the finished piece.

If you're not yet or haven't recently been a watcher of Quilting Arts TV, please check it out.  There are so many interesting techniques featured and so much to learn from the Quilting Arts community!

Thursday, September 2, 2021

Quilt Camp Day 8

We are winding down and not starting anything that can't be finished in a day as Sue is preparing to leave on Friday.  :(

Today we did more washing out of fabric batching in dye, a bit more cyanotype, and worked on some PGFiber2Art "business" stuff.  Also, we have some pictures to share that didn't make it into yesterday's post.  Sue did a re-dip of some of her "ugly" fabrics in the indigo pot.  Both of the pieces below were originally a gold/brown fabric that Sue posted a few days ago.  The first indigo treatment helped, but they still needed more, so this is what they look like after the second dip in the indigo pot.


The piece below is one that originally looked like a cow - brown with white spots!  If you go back to Day 6, you can see the original fabric and what it looked like after the first dip in indigo.  In the piece below, the circles along the edges came out clearly the first time, but the rest was still blah.  So Sue cut off the circles and refolded the center for another dip.  Below you can see what it looks like now.  Much improved!  And how it would look with the circle strips placed beside it.


Another technique tried today was cyanotype printing on notecards.  The chemical solution was applied to notecards with a bristle brush, allowed to dry, and then printed with plant material.  Even though it was a cloudy day, the process worked well.


Elizabeth printed two small cyanotypes on fabric, a dill blossom and another with goldenrod and broccoli seed pods.


A new screen soon to be in the Etsy shop is birch bark.  Here it is, printed with Color Magnet and then dyed in avocado green and black (which was old dye and turned purplish).  It will be a nice addition for those who need a screen to add texture to your fabrics and designs.  It could also be printed with paint, it doesn't have to be Color Magnet. If you have a photo you think would make a good textural screen, contact us at pgfiber2art.gmail.com or through the Etsy shop. 


The day ended with rain and an amazing sunset, even while it was raining!

Sunday, August 29, 2021

Quilt Camp Day 4

Day 4 of quilt camp - it was a cool, cloudy day so not the best for sun printing.  We did some more shibori/indigo dye of the pieces prepared yesterday, and washed out some other dyed pieces.  Below are: left, Sue's pieces after one dip in the indigo pot; top right, Elizabeth dipping one of her pieces; bottom right, pieces awaiting a second dip in the pot.

Below, Sue's pieces after rinsing.  Top left is a rust dyed piece (not from the indigo pot); the other 3 photos show the pieces she dyed today.  The 2 stripey ones were wrapped around poles.  The one with the light background was a triangle fold with plexiglass circles clamped over the corners.  The one with the light blue circles were made with buttons that were rubber banded into the cloth - the rubber bands served as a resist to create the circles.


Elizabeth decided to experiment in the indigo pot with some fabrics which were less than successful from other dye projects and see if they could be improved upon.  Here are some as she unwrapped them.  The pink and mottled green were clamped with wooden blocks and the lime green was folded like a flag.


Below is the bottom piece of fabric (from above-the one with the circles) on the right side after unfolding and the remainder of the "less than successful fabric" is what it looked like before the indigo pot.  

She also overdyed a piece of rusted fabric with the spiderweb pattern and is quite happy with the results.


This set of pictures shows Sue's dyed/washed fabrics.  Top left is spring green; before dyeing, the fabric was printed with a birch bark Thermofax screen using Color Magnet which is a dye attractant, creating the textured pattern.  Top right is a piece dyed with a color called parakeet.  The bottom 2 are the same piece of fabric.  This was dyed with "new black".  To give it some texture, Sue used a discharge product called deColourant to remove some color through a Thermofax screen - this was also a birch bark screen, though a different one than on the green fabric.  Click on the photo for a better view.


With some new screens for playing Elizabeth decided to see what they might look like if they were screened on white fabric with Color Magnet and then dyed.  We will reveal them later in the week.


Elizabeth set out a piece of fabric prepared for Cyanotype.  As the day was cloudy, she used the wet cyanotype method and first spritzed the fabric with a solution of vinegar and water.  The white areas you see are actually the reflection of the sky and the darker areas are the shadow from a tree.  It will be interesting to see what happens after 24 hours of exposure.


Monday, May 7, 2018

Indigo T-shirts with Kids

Sunday at Herndon ArtSpace we taught a group of 7 kids and 1 mom about dyeing with indigo and some methods of creating resists for the dye called shibori.  Indigo is a natural dye that historically comes from plants, but a large amount of the dye produced today is synthetic.  It is the dye that is most often associated with denim and blue jeans. After learning some simple folds and other ways of creating resists with marble and golf balls, the girls practiced with bandanas.
Then we went outside to start the dyeing process.  The indigo forms a "flower" on top of the pot, which is basically foam, that needs to be removed before putting anything into the dye. After wetting the items to be dyed in plain water, they were ready to go into the indigo. 
It's important not to create a lot of movement in the indigo pot because that incorporates too much oxygen.  Hold the object you are dyeing below the surface and gently massage to work the dye through the layers. When the items are first removed from the indigo, they are green.  But exposure to oxygen in the air changes them to the familiar blue color.  Here are some of the bandanas.  You can still see small amounts of green in the first one.


After dyeing the bandanas, they prepared their t-shirts and went through the same process.  Here are some of the results.


They all seemed to have a good time and everyone had successful results.  It was fun to share this technique with a different age group!

Monday, August 7, 2017

More Indigo

We hope you're not totally tired of indigo and shibori posts yet.  Just one more day of indigo results, then we'll move on to other things - at least that's the plan!
We watched a video by Charlotte Scott that showed more ways to fold, wrap and tie the fabric.  Above are 2 of Elizabeth's pieces, on the left was rolled up like a sushi roll; on the right was folded in half and then loosely formed into a bull's eye and tied with string or rubber bands.
Becky's scarf is done with a variety of items - the wiffle golf balls, floral marbles, 3-d small triangles.  Because it was folded in half, you can see the different results between what was on the inside and what was on the outside.
Molly was resurrected from the loft to display Elizabeth's t-shirt, done with accordion folds and rubber bands.
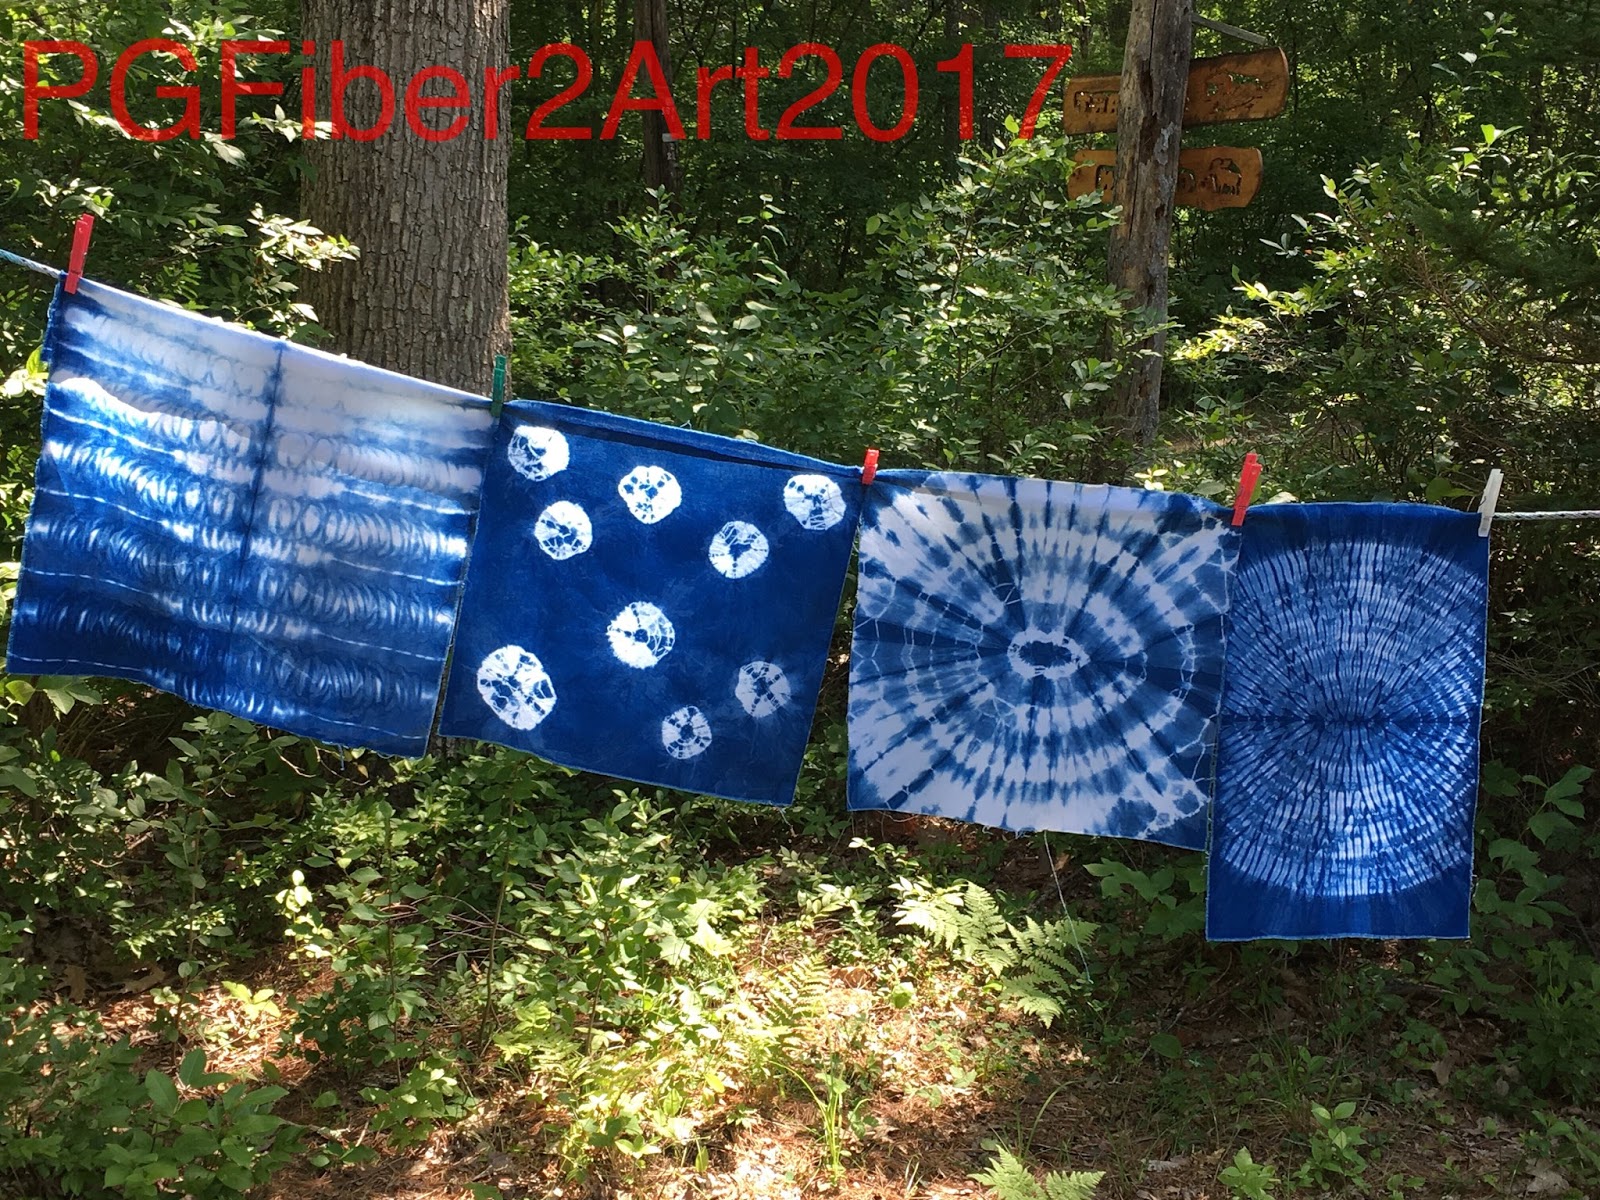
These are the 4 pieces Sue did yesterday; top is the bull's eye, then a stitched circle piece, the small one is the sushi roll, and the bottom left is spider webs.
And the results, left to right: sushi, spider webs, bull's eye, and stitched circles.  Enlarge the photo to see better detail.
And to prove that we have done other things, Sue started these 2 earlier in the week, trying to get something useful for a desert background.  The piece on the right is bronze, the one of the left started with mocha, and then she added yellow.  Mistake!  Should have left well enough alone, also should have used a different container.  Oh well, lessons learned and it can always be over dyed!

Sunday, August 6, 2017

Indigo Round 2

On Saturday we dipped some more prepared pieces in the indigo dye pot, trying different folding, tying and resist techniques.  We also thought we'd show what the "bloom" or "flower" looks like that forms on the top of the pot.  When you want to use the indigo, you first remove the bloom and set it aside, then replace it when you are finished.  As long as the bloom lasts on top of the pot, your dye is still active.  If it disappears, the pot will need to be refreshed.  You can read more about maintaining an indigo pot at the ProChem or Dharma websites.
Sue used some acrylic shapes that were clamped to the folded fabric to create a resist.  In this photo you can see the fabric still oxidizing from green to blue.
Here's the piece after washing and drying.  The shapes came out really crisp.
Elizabeth did this piece which was accordion folded, first in one direction, then the other so it was a small square and held it together with rubber bands.
This one was folded in half (see the dark line down the middle?), then accordion folded and banded.
This was a standard flag fold (triangles).
Sue decided to use the zigzag stitching technique on a t-shirt.
And a few more pieces are hanging on the line today!