Tuesday, December 17, 2019

Postcard Swap

Our regular blog followers may recall previous posts about Sue's postcard swap group.  It looks like it's been a while since we've posted about a swap.  We have been a steadfast group of 5 for a number of years (the original group got its start more than 10 years ago).  For our most recent swap in November we grew to 6 participants, but one member has decided to bow out so we'll be back to 5.   Our theme for this round was "silhouettes".  It's always fun to see how everyone interprets the theme.

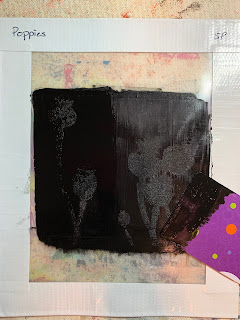
Sue opted for choosing a Thermofax screen as her silhouette (no surprise there).  The screen she chose was poppies.  She started with some ice dyed fabric and first printed grasses as part of the background.
Then the poppies were screen printed in black to create the silhouette.
Each of the finished cards was slightly different because of the ice dyed background fabric. This is the group of cards that Sue made.  She chose poppies as the silhouette in honor veterans.
The other "posties" had varied interpretations.
Grace is our new member who made this lovely layered silhouette of the queen. The text in the background is overlaid with the blue and red segments.
Cathy created this striking California sunset.
Sherry had a unique interpretation with this cat silhouette created from thread scraps trapped under tulle.
Lois lamented that our visions of ourselves don't always match what we see in the mirror. :(
Paula got us all humming a tune with her interpretation of the song "Silhouettes on the Shade".

What will the theme be next time?  Our next round will be due by the end of June.  Guess you'll have to follow along to see what comes next.

Thursday, November 14, 2019

Balloon Flowers

Last week Sue shared pictures from a Whisper Challenge.  If you followed along on Facebook, Barbara Wise guessed  Sue's quilt to be the Balloon Flowers.  So today we are sharing some process photos.  This is the inspiration photo that Sue used in creating her quilt.

The technique used for the background is one developed by Terry Kramzar.  It has the look of square in a square blocks but without any seams.  The blocks are backed with fusible batting, quilted, then the  small squares are appliqued on.  If you look at her website, you'll see this technique as a background for many of her quilts.

She also has her own ruler to make placement of the square easy.

After completing the background, the stems and leaves for the flowers were added.

The flowers were cut from gradient fabric that came from Colorways by Vicki Welsh. After cutting out the shapes, details were added with Inktense pencils.

The stems and leaves were stitched first, then the flowers were placed and stitched.

Here's what the back looked like after all the stitching before the backing was added.

The final quilting is stitch in the ditch between all the squares.  Below is the finished quilt.

The process made this a fun quilt to make.  Check out Terry's website for examples of how she uses this technique in her work.

Thursday, November 7, 2019

Whisper Challenge

Well, here we are again.  A couple of months have gone by since our last blog post.  It seems once you get out of the habit, it's easy to let it slide.  But, this week Sue has results of an art group challenge to share.  For an annual challenge, our art bee decided to repeat a "whisper" challenge that we had done the year before.  It works like a game of telephone in that the first person chooses a photo and makes a quilt inspired by the photo.  Then their quilt gets passed to the next person, who makes theirs based on the first one, and so on.  Only the first person sees the picture, and each succeeding person sees only the quilt prior to theirs.  It is certainly interesting to see the results!

So, this was the inspirational photo for this go-round.
The next photo shows the first 2 quilts in the sequence.
As the first quilt maker explained, she was inspired by what was missing from the photo - specifically the leaves that had already fallen from the tree.  So she featured 5 different types of leaves in her quilt.  The second person focused on the fact that there were 5 items and came up with her design.
Quilts 3, 4, and 5 follow pretty closely with the colorful segments of quilt 2.  Quilt 3's colorful circles are representative of beach balls (or hard candies?); the beach balls inspired a beach umbrella with segmented colors; and the umbrella inspired colorful balloons.
In quilt # 6, the balloons inspired balloon flowers.  The balloon flowers became fractured flowers. And the fractured flowers led to an Asian inspired quilt.  What do you think?  Interesting transitions, eh?  It's fun to see how one piece led into the next, especially when you hear about the thought process of the maker.  

Have you guessed which quilt is Sue's?  If you have a guess, leave a comment on this post!  She'll do another post and share some process photos from making the quilt.

Friday, August 16, 2019

Mini "Quilt Camp"

If you've followed our blog for any length of time, you know that Elizabeth and Sue usually get together in New Hampshire in the summer for "quilt camp".  This is not an actual "camp", just us having play time at Elizabeth's summer house on Lake Winnipesaukee. Unfortunately circumstances haven't allowed for us to have quilt camp this summer, but since Elizabeth is back in VA for a few weeks for a medical procedure, we managed to get together for a play day.  Both of us have been experimenting with cyanotype printing (also known as blueprints) - this is a form of sun printing in which specially treated fabric turns blue when exposed to the sun.  Natural objects are most often used as resists to block the UV rays and create the print. If you follow us on Facebook or Instagram, you'll see lots of pictures like this one.
Another product that is supposed to work similarly to cyanotype is called Solar Fast by Jacquard.  There are various colors that are painted onto the fabric, and as with cyanotype, something that blocks the UV rays creates the print.  Sue had some leftover product and decided to see if it would still work.  In addition to natural objects, you can use transparencies of images to create prints, so she decided to try transparencies of some of our screen printing images.
Above are the Jacquard Solar Fast film product and the printed images Sue used.
This is the "before" photo - the 2 pieces that look yellow are painted with teal colored solar fast, and the pinkish one is painted with violet.  The black images are the transparencies.
This is what they looked like after exposure to the sun.  They were outside for about 45 minutes; the recommended time was 10-20 minutes. However the results were less than inspiring.
Not sure if the product was too old, exposure wasn't long enough, sun not bright enough?  Lots of variables.  Perhaps buying fresh product would help answer the question.  At any rate, we did try transparencies with cyanotype fabric and that did work so the transparency was not the problem.
Sue wanted to do some low water immersion dyeing so set up these 6 jars with the primary and secondary colors.  More to come on those results.
Back to cyanotype printing.  These are the same transparencies from the solar fast on cyanotype pre-treated fabric.  The top is Jacquard fabric and the bottom is from Blueprints.  This photo was taken after exposure, before rinsing.  The image is a little hard to see, especially the bottom so you might have to enlarge. After rinsing, the results are quite different.
This is one of our crackle screen images, and was done with a dry process. (We have been experimenting with wet cyanotype too.) Much better results than the solar fast.
Surprise, this piece turned out to be green!  It was hard to tell what color it was before exposure.
This treble clef was a card stock cut out that did a good job of blocking the UV rays.
Between the fabric and ginkgo leaves was a small piece of cheesecloth.  Since the threads are so fine, it didn't make a real noticeable print except where the edges were a little thicker.  Oh well, it's a matter of figuring out what works and what doesn't.
Finally, an attempt at sun printing with paint, trying Artistic Artifacts paints to see if they would work.  The results were not as good as we hoped, but worth another try. The fabric should have been wet before applying the paint, so perhaps that would have made a difference.
The print is kind of vague, so we decided enhancing the edges would "fix" it.
A gold sharpie was used to outline the edges. 

Stay tuned for more on the dyed fabrics.


Monday, July 22, 2019

Sacred Threads 2019

If you've been a follower of our blog, you've probably noticed that we haven't posted in a few months.  Sometimes life happens, and certain things become less important.  Sue lost her mother in May, not an unexpected event as she was 97, but still, losing your mother is never easy.  And keeping up with a blog has not been a priority.  We have been posting regularly on Facebook and Instagram though so hopefully you've kept up with us there.  Unfortunately, once you step away from a blog routine, it is easy to let it slide.  We often wonder if people are really reading it; is it worth the time that goes into it?  I guess we'll see.

The impetus for finally getting back to the blog is the current show called Sacred Threads that is on exhibit here in Northern Virginia.  It's got another week to go so if you are anywhere near by, it is well worth your time to make the trip to see it.  This show is unlike any other, in that it features quilts on the topic areas of joy, inspiration, grief, healing, spirituality and peace/brotherhood.  The maze-like set-up provides a very intimate setting as soft music plays in the background. It can be a very emotional experience, especially in the section devoted to grief and healing.

Sue took some time to visit the show last week and was back for a lecture and second look on Sunday.  She has a quilt in the joy segment of the show.  These are just a few of the quilts that made an impact on her in one way or another.
Dancing on Dappled Ground is by Norma Fredrickson of Berryville, VA.  Norma is a customer of our Thermofax screen business, so it was nice to see some of her art work in person.
This is Sue's piece called The Bridesmaid. It is based on a photo of her daughter when she was a bridesmaid in her childhood friend's wedding.  Both this and Norma's piece are in the "joy" section.
Ashes of Roses in the spirituality section is by Ellen Eriksen Parrott of Dansville, MI.  The maker has a collection of vintage photos of infants in christening gowns and based this on one of those photos.  She sees both the promise and hope for the child's future while also realizing that this child's life is probably over. Having spent time recently going though vintage family photos is probably what attracted Sue to this piece.
Another piece in the spirituality section is The Stone Bridge by Patricia Caldwell of Cottonwood, AZ. Patricia's work is frequently featured in Vicki Welsh's newsletter (Vicki is a fabric dyer), so it was intriguing to see some of Patricia's work in person.
Another spirituality piece is Mechanical Man by Jim Vander Noot of West Chester, PA.  According to Jim, the mechanical man represents those things in our daily routine we do automatically, yet the spark of life pokes through the cracks.  This is one of those pieces that the closer you look, the more you are drawn in and begin asking 'how did he do that?"
Suspended Moments is by Gabriele DiTota of Melbourne, FL and was part of the healing section.  This piece reflects time spent in a garden and moments in nature that restore the spirit.  The first thing Sue was attracted to was the cyanotype prints in the center, and then the surrounding fabrics with their varied surface design also became apparent.
In the inspiration section was Boundless Love - Cuddle Time by Jane L. King of Longmont CO showing the connection between mother and child. The soft  colors and quilt in the background add to the feeling of calm and peacefulness.
The quilts in the grief section illicit the most emotional reactions.  This piece called Pulse is by Martha Wolfe of Davis, CA.  It shares the text messages from a young man to his mother inside the Pulse nightclub.  As a quilter, Ms. Wolfe is tired of making hearts for victims of mass shootings, and we agree.
Death Toll by Susan Brubaker Knapp of Mooresville, NC is another quilt in the grief section.  It was made to express her sorrow and outrage after the shooting at Marjory Stoneman Douglas High School. The 17 roses represent the 17 victims.  The tic marks represent those killed in mass shootings since 1984 by AR-15.
And back to the section on joy, was this quilt called Daisy Field Exploration by Roberta G. Porter of Batavia, OH.  It is based on a photo of the maker's granddaughter when she was 4 years old and the connection to the natural world that brings joy and beauty.

This is just a small sampling of the 245 quilts in the Sacred Threads exhibit.  In addition, there is a special exhibit called Eye Contact.  Quilters were invited to submit 5" x 23" pieces featuring only eyes.  All submission were accepted for display, and made for a fabulous addition to the show.


Tuesday, April 23, 2019

May Thermofax Printing Class

We will be teaching our next Thermofax printing class on May 18 at Artistic Artifacts.  For Thermofax Technique Sampler, we have refined our focus to concentrate on the techniques and products that can be used to create images with Thermofax screens. This class is suitable for beginners as well as experienced printers, and even if you've taken another version of our class before, there will be some different techniques/products in this one.
We will be working with page sizes of 6 x 8 inches and each one will illustrate a different technique or product that can be used for printing.  Our list runs to about 20, so we will be working diligently to get them all completed in this one day class.  When the pages are complete, they can be assembled into a book in any manner you choose.

These 4 techniques include white paint used as a resist, a 2-screen image that has an outline and fill, foil and glue, and a water-based resist.


Other techniques include printing with multiple colors, using opaque paint, printing transparent paint over opaque, and printing with a combination of Inktense color blocks and matte medium.  


In this example, deColourant discharge product is used on 3 different fabrics to show variation.


Another discharge method uses bleach gel, again on different fabrics to show color variations.


Sue chose to print her labels on inkjet fabric and fuse them to the pages, but you can also just write directly on the page itself, and include more detail such as type of paint and/or specific product used.


Here's the inside cover and first page.


And the page using foil and glue.


We have this and more in store for you so if you are near the Washington, DC area, we would love to have you join us on May 18 at Artistic Artifacts in Alexandria to learn how versatile Thermofax screens can be!

Tuesday, April 9, 2019

Tea Bag Revival

Libby Williamson is a fabulous teacher, as she proved once again in her Tea Bag Revival class at Artistic Artifacts on Sunday.  (She also taught a 2-day Paint and Stitch class on Friday and Saturday.) Sue was in the Sunday class with 2 friends from out of town - all 3 of us took the 2-day class 2 years ago. Libby's art and style is very intuitive and whimsical - very "throw out the rules and make up your own", so there's no pressure to be perfect.  She creates a fun and relaxed environment to try something new. The focus of the class was using tea bags (steeped, dried and emptied) as the foundation for collaged art.
Here's Libby with one of her sample quilts. The brown squares you see are the tea bags.
In the  foreground of this photo, you can see some of the prepared tea bags.  The tea bags are fused to a muslin base to stabilize them for sewing.
Here Libby demonstrates the process for emptying the tea bags and fusing them to the muslin.
This is another of Libby's samples.  Enlarge the photos to get a better look at the mini collages.  We used small pieces of fabric and painted papers to create the collages, which are machine stitched with black thread and also embellished with hand embroidery.
These are Sue's tea bag collages.  All the pieces are "glued" to the bags with matte medium which has to dry before proceeding.
The stitching is kind of intuitive, some just outlining and/or keeping with the mostly geometric shapes.
These are the machine stitched collages.  There are 6 more in addition to the original group of 12.  The next step is adding hand stitching.
These are the collages Denise is working on.
And here are Paula's collages.  Aren't they both great?
Libby did some instruction on how she arranges them on the background, as well as adding some other fabrics under and between some of them.
After some additional stitching at home, Sue finished the embroidery on 12 collages.  She is working on 4 more for a grid of 16.  Then it will be time to play with adding some additional fabrics to the background and stitching it all together.  There will likely be more hand stitching as well.  Stay tuned for more on the final product.  This was a fun class and we highly recommend Libby as a teacher.  She teaches all over the country, so if she's ever in your area, sign up!  Libby's website is called Art Soup and you can also follow her on Facebook to see what she's up to.  If you're a subscriber of Quilting Arts, she been a cover girl and has articles in 3 issues - June/July 2017, April/May 2018, August/September 2018.  Check them out!