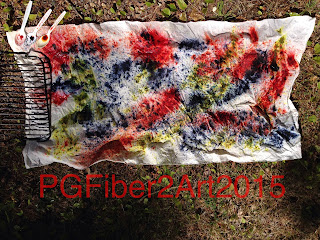
After donning your respirator in
an abundance of caution for your lungs and starting with a damp piece of fabric
soaked in soda ash, you sprinkle dry dye powder directly on the fabric. Best to
do this on a windless day also. After
sprinkling on several colors you can hang the piece on the line and then use a
spray bottle with a soda ash solution in it to spritz the fabric. As you spritz you will see the dye begin to
run toward the bottom of the fabric giving you a lined look on the fabric along
with little dots from the sprinkling process.
The more you spritz, the fewer dots you may end up with. Choose your color combinations carefully so
as not to end up with mud.
Elizabeth and Sue both tried this process at separate times, and you'll notice somewhat different results. Elizabeth was judicious in her use of dye powder and kept the colors somewhat separated. She used the primaries - red, yellow, blue. The dye is sprinkled on the fabric while lying on the grass.
More of the soda ash solution is sprayed on as the piece hangs on the line. You can see the colors blending to make new colors and the linear effect of the process.
Sue, on the other hand, used lots of dye - 6 colors in varying shades of red, fuchsia, orange and some yellow. Rather than keeping them somewhat separated, she sprinkled all of them over the whole piece, hoping for some interesting color variation. What didn't occur to her as she saturated her fabric with the soda ash spray was that the darkest colors would overpower the others and result in a pretty uniform overall color.
You can see some streaks, but still a pretty uniform color. As it dried and was washed, the streaks became less noticeable. She thinks she will add another process to this piece to add some more texture - maybe some discharge since it is such an intense color. Lessons learned:
- don't overdo the dye
- go easy on the spray - the fabric doesn't need to be saturated
- consider how the colors you use will blend - opposites on the color wheel will make mud
- make sure you have an appropriate outdoor spot for the process - dye will dip on the ground


No comments:
Post a Comment