Showing posts with label indigo. Show all posts

Monday, June 26, 2023

SAQA Benefit Auction

Each fall, Studio Art Quilt Associates (SAQA) holds an art quilt auction as its main fund-raising event. Proceeds support exhibitions, publications, and educational outreach. Twelve-inch square quilts are made and donated by members and then auctioned in an online event over a period of 3 weeks in September/October.  Sue recently completed and sent in her donation.

"Filtered" was made from scraps of shibori/indigo and rusted fabrics along with a cyanotype printed on a flattened coffee filter.  Both hand and machine stitching were used to quilt and embellish.


Here is the background prior to adding the cyanotype where you can see the various fabrics used, all leftovers from previous projects.


Portions were quilted with straight line machine stitching.  Other parts were enhanced with hand stitching.


Above you can see some of the hand stitched circles and a row of fly stitches across the bottom. You can also see the machine stitching that outlines the cyanotype print and a blanket stitch used around the edge.


Here is the backing with corner triangles for hanging, or alternatively a ribbon loop in the center.


And the finished piece.  Watch this blog and our other social media for notice when the auction takes place this fall.  Bidding is open to anyone.  There are always many fabulous pieces of quilt art available.

Tuesday, August 31, 2021

Quilt Camp Day 6

We were saying to each other today that it doesn't seem like we get as much done these days as we once did!  What's up with that?

If our math is right, this is the tenth time we have had quilt camp.  The number of years is higher  because we had a few years when we couldn't get together.  Probably somewhere around 14 years we have come to the garage here at Merrymount on the shores of Lake Winnipesaukee to stir our creative juices and work on our business selling Thermofax screens through Etsy and promoting them on social media.

Today Elizabeth rinsed out the excess dye from this lovely vine flower Thermofax screen done with Color Magnet and Coral MX dye.


And her pole dyed piece.  Not sure why this year the white lines from the string isn't as prominent.  Perhaps oversoaked, not wound and scrunched tightly enough or too few layers on the pole.  It is still ok, just a faint glimpse of texture.


You saw a sneak peek at Molly's new shirt the other day on the blog but not the vine flower around the hemline.  The t-shirt was first screened with the design using Color Magnet, left to dry and then ice dyed.


Elizabeth also screened this hand drawn ginkgo leaf, onto a long piece of previously dyed fabric, using a blue acrylic fabric paint which sparkles just the slightest amount.


And this green piece was screened with a new screen made from a photo of birch bark.


Sue has some pieces that didn't get included in yesterday's post.  One is this piece of rusted fabric that was folded and dipped in the indigo pot.

In an effort to make some ugly fabrics more palatable, they were also dipped in the indigo pot.  The left photo is "before", the right photo is "after".  A small step in the right direction.  Looks like another dip in the indigo pot is called for!

We didn't have much sun today, but there was enough to put out a quick sun print with some stencils.

The best ending to the day was that Bob drove us to Wolfeboro and treated us to an ice cream at Bailey's Bubble.


Sunday, August 29, 2021

Quilt Camp Day 4

Day 4 of quilt camp - it was a cool, cloudy day so not the best for sun printing.  We did some more shibori/indigo dye of the pieces prepared yesterday, and washed out some other dyed pieces.  Below are: left, Sue's pieces after one dip in the indigo pot; top right, Elizabeth dipping one of her pieces; bottom right, pieces awaiting a second dip in the pot.

Below, Sue's pieces after rinsing.  Top left is a rust dyed piece (not from the indigo pot); the other 3 photos show the pieces she dyed today.  The 2 stripey ones were wrapped around poles.  The one with the light background was a triangle fold with plexiglass circles clamped over the corners.  The one with the light blue circles were made with buttons that were rubber banded into the cloth - the rubber bands served as a resist to create the circles.


Elizabeth decided to experiment in the indigo pot with some fabrics which were less than successful from other dye projects and see if they could be improved upon.  Here are some as she unwrapped them.  The pink and mottled green were clamped with wooden blocks and the lime green was folded like a flag.


Below is the bottom piece of fabric (from above-the one with the circles) on the right side after unfolding and the remainder of the "less than successful fabric" is what it looked like before the indigo pot.  

She also overdyed a piece of rusted fabric with the spiderweb pattern and is quite happy with the results.


This set of pictures shows Sue's dyed/washed fabrics.  Top left is spring green; before dyeing, the fabric was printed with a birch bark Thermofax screen using Color Magnet which is a dye attractant, creating the textured pattern.  Top right is a piece dyed with a color called parakeet.  The bottom 2 are the same piece of fabric.  This was dyed with "new black".  To give it some texture, Sue used a discharge product called deColourant to remove some color through a Thermofax screen - this was also a birch bark screen, though a different one than on the green fabric.  Click on the photo for a better view.


With some new screens for playing Elizabeth decided to see what they might look like if they were screened on white fabric with Color Magnet and then dyed.  We will reveal them later in the week.


Elizabeth set out a piece of fabric prepared for Cyanotype.  As the day was cloudy, she used the wet cyanotype method and first spritzed the fabric with a solution of vinegar and water.  The white areas you see are actually the reflection of the sky and the darker areas are the shadow from a tree.  It will be interesting to see what happens after 24 hours of exposure.


Monday, May 7, 2018

Indigo T-shirts with Kids

Sunday at Herndon ArtSpace we taught a group of 7 kids and 1 mom about dyeing with indigo and some methods of creating resists for the dye called shibori.  Indigo is a natural dye that historically comes from plants, but a large amount of the dye produced today is synthetic.  It is the dye that is most often associated with denim and blue jeans. After learning some simple folds and other ways of creating resists with marble and golf balls, the girls practiced with bandanas.
Then we went outside to start the dyeing process.  The indigo forms a "flower" on top of the pot, which is basically foam, that needs to be removed before putting anything into the dye. After wetting the items to be dyed in plain water, they were ready to go into the indigo. 
It's important not to create a lot of movement in the indigo pot because that incorporates too much oxygen.  Hold the object you are dyeing below the surface and gently massage to work the dye through the layers. When the items are first removed from the indigo, they are green.  But exposure to oxygen in the air changes them to the familiar blue color.  Here are some of the bandanas.  You can still see small amounts of green in the first one.


After dyeing the bandanas, they prepared their t-shirts and went through the same process.  Here are some of the results.


They all seemed to have a good time and everyone had successful results.  It was fun to share this technique with a different age group!

Monday, August 7, 2017

Quilt Camp Day 10

We promised to do something different today and we did!  It was Sue's last day at quilt camp so we tried to squeeze in as much as we could.  Of course, just when we get in the groove, one has to leave.  We watched several episodes of a Quilting Arts DVD over the past few days and one episode featured Julie Booth and her process for using liquid dish detergent as a resist.  We know Julie because she also teaches at Artistic Artifacts, and knew about this technique from her book, Fabric Printing at Home, but had not tried it yet.  (Yes, we're a little behind.  Julie's book has been out a couple of years and the DVD is series 1700 from 2015.)  At any rate, we had fun playing with this resist. 
The first step involves mark making with the dish soap.  Here Elizabeth is using a stiff brush to make dots.  After the soap dries (about 30 minutes), the next step is a wash of diluted transparent paint.  Julie used black in her demo; Sue used peacock and Elizabeth used navy blue.
After the paint dries, you heat set the paint, then rinse out the dish soap.  Of course, if you want your design in white, you could stop at this point.  After letting the pieces dry again, the next step is adding color with diluted textile paint.  At this point, it's kind of like water color, letting the colors blend where they overlap.
These are our pieces drying on the line.  And close ups below.
Sue's pieces above.  Elizabeth's pieces below.
It was fun to experiment and we learned some things we would do differently next time.  More details in a future post.

Sue also did a bit of thermofax printing.
Our puff ball screen is a little tricky - very easy to get too much paint.
On this piece, half is the puff ball and the other half is ginkgo leaves.  (The intent was to cut in two.)
And this one uses the mum screen in 2 sizes.   This is our favorite of the 3 prints.  And just in case you're missing indigo, here's one more that Elizabeth did, a pillow cover (purchased as a blank.)
Sue will be traveling on Tuesday, so it will be up to Elizabeth to share more tomorrow!

More Indigo

We hope you're not totally tired of indigo and shibori posts yet.  Just one more day of indigo results, then we'll move on to other things - at least that's the plan!
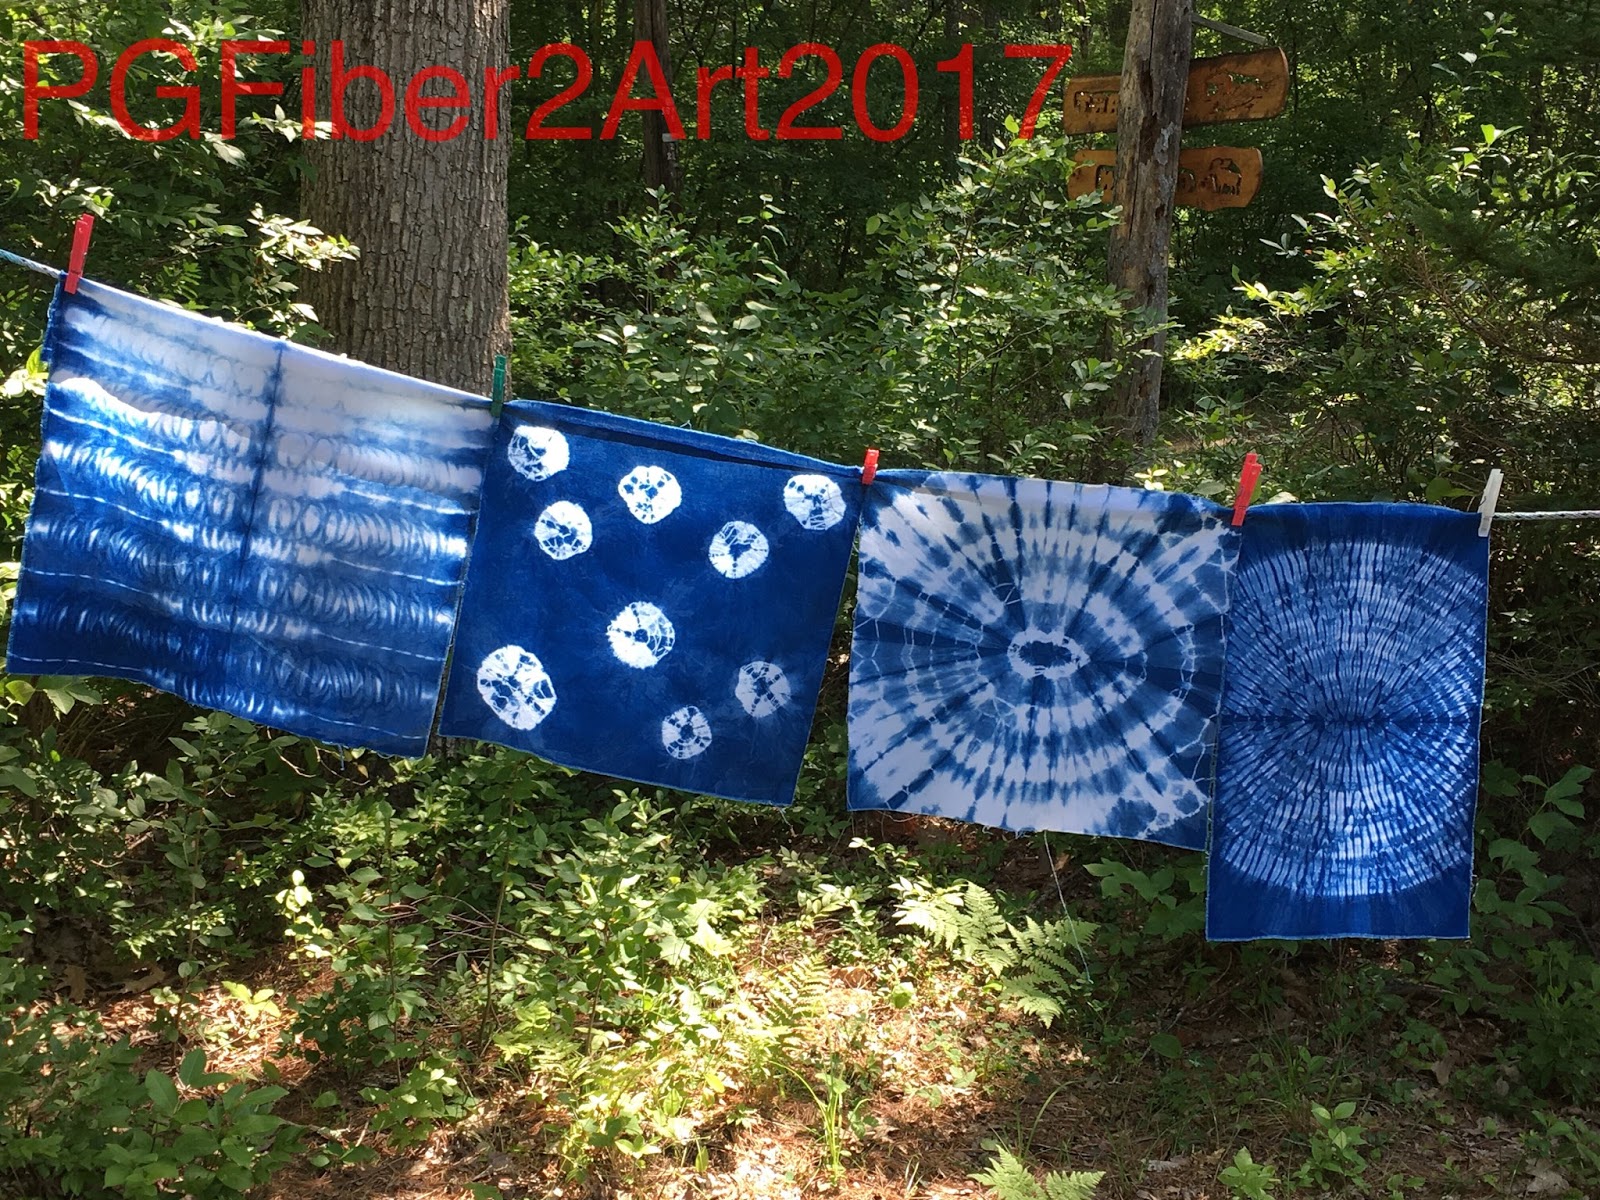
We watched a video by Charlotte Scott that showed more ways to fold, wrap and tie the fabric.  Above are 2 of Elizabeth's pieces, on the left was rolled up like a sushi roll; on the right was folded in half and then loosely formed into a bull's eye and tied with string or rubber bands.
Becky's scarf is done with a variety of items - the wiffle golf balls, floral marbles, 3-d small triangles.  Because it was folded in half, you can see the different results between what was on the inside and what was on the outside.
Molly was resurrected from the loft to display Elizabeth's t-shirt, done with accordion folds and rubber bands.
These are the 4 pieces Sue did yesterday; top is the bull's eye, then a stitched circle piece, the small one is the sushi roll, and the bottom left is spider webs.
And the results, left to right: sushi, spider webs, bull's eye, and stitched circles.  Enlarge the photo to see better detail.
And to prove that we have done other things, Sue started these 2 earlier in the week, trying to get something useful for a desert background.  The piece on the right is bronze, the one of the left started with mocha, and then she added yellow.  Mistake!  Should have left well enough alone, also should have used a different container.  Oh well, lessons learned and it can always be over dyed!

Sunday, August 6, 2017

Indigo Round 2

On Saturday we dipped some more prepared pieces in the indigo dye pot, trying different folding, tying and resist techniques.  We also thought we'd show what the "bloom" or "flower" looks like that forms on the top of the pot.  When you want to use the indigo, you first remove the bloom and set it aside, then replace it when you are finished.  As long as the bloom lasts on top of the pot, your dye is still active.  If it disappears, the pot will need to be refreshed.  You can read more about maintaining an indigo pot at the ProChem or Dharma websites.
Sue used some acrylic shapes that were clamped to the folded fabric to create a resist.  In this photo you can see the fabric still oxidizing from green to blue.
Here's the piece after washing and drying.  The shapes came out really crisp.
Elizabeth did this piece which was accordion folded, first in one direction, then the other so it was a small square and held it together with rubber bands.
This one was folded in half (see the dark line down the middle?), then accordion folded and banded.
This was a standard flag fold (triangles).
Sue decided to use the zigzag stitching technique on a t-shirt.
And a few more pieces are hanging on the line today!