Sunday, July 9, 2017

Setting Up a Printing Station

As Elizabeth sets up for quilt camp in the hope that Sue can make it to New Hampshire this summer, we thought it might be a good idea to show you how we create our printing station.  First, a sturdy counter top or table is in order.  You don’t want anything that wobbles or anything that makes your back hurt from hunching over it.  In our temporary summer studio (also known as the garage), we use two saw horses with a thick piece of plywood on top.
Our next layer is a piece of polyester craft felt which can be bought off a bolt at fabric stores.  We bought ours at JoAnn’s Fabrics and Crafts.  You can see that ours has been well used over many summers as sometimes dye or paint will bleed through a bit.  Make sure it is a piece of felt you want to dedicate to this purpose.
The last layer of the printing station is a topper which can be switched out if it gets too wet with paint because you don’t want to get paint from a previous print on the back of your new one.  A simple piece of muslin will work, but we use a heavier piece of canvas cloth.  You could put a piece of muslin over the top of the canvas as well.  What you are aiming for in making this layered surface is something firm enough to push against but with a bit of give to it so that when you press the squeegee over the screen you will get an even perfect print. You can see that our cover canvas cloth is well used; once it is really saturated with paint you definitely want to change cloths so that it will have some absorbency for any leftover paint that might go through the fabric which you are printing.
Now you are ready for some printing fun…….

Thursday, June 22, 2017

Painted & Stitched Fabric Collage

In Libby's class we also made a fabric collage.  Like the journal cover, this was built on a canvas background with fabrics and vintage textiles added for texture, and stitched with black thread.  This is Libby's sample (apologies for the poor picture).
The flowers and leaves are thread sketched with black thread on white-on-white fabric, then painted, and appliqued to the background.
Libby demonstrated her technique for painting the fabric after thread sketching.
Sue stitched out her flowers and leaves/stems, then painted them and cut them out.


Here's her background before adding the flowers; all the pieces were stitched down during class.
The flowers and stems were pinned down, with a place holder for the vase to get an idea of the final look.
After fiddling some more at home, here's how it evolved. The pot is made from some hand dyed/thermofax printed fabrics.  The screens used were circles and crackle which can be found in the Etsy shop.
Is it finished?  Maybe, maybe not.  Adding some background stitching is a possibility.

This was a great class, I really felt like an artist while creating these projects!  Thanks Libby!
And because I forgot to include it in yesterday's post, here's a shot of Sue, Paula and Denise with some of our class work.

Wednesday, June 21, 2017

Collage Journal Cover

We started out Libby's Paint & Stitch class by painting papers, as shown in yesterday's post.  Then Libby demonstrated how she uses the painted papers to create a collage on the front of a journal cover.  (The one below is a sample collage, not an actual journal cover.  Wish I had taken more pictures of her journals!)
The papers are applied with matte medium and allowed to dry.  Then free motion stitching is added with black thread to give definition and add detail.
 A layer of felt underneath the canvas fabric adds stability and depth.
Libby adds thread sketching on the back as well as inside cover and signature on the inside back.  The top and bottom edges are "scribble" stitched to hold the layers together.
Above is Sue's collage before stitching.
And after stitching.  A standard composition book fits inside.  I wish I had taken more pictures of the process, but I was having so much fun creating, I didn't think about it!  I was also surprised how quickly this project came together.  Totally freeing, embracing imperfection!  Thanks, Libby!

Tuesday, June 20, 2017

Paint & Stitch Magic

Over the past weekend, Sue had great fun in a 2-day class at Artistic Artifacts with Libby Williamson of Blue Denim Design.  Libby is from California and has a unique approach to art quilting, which combines painted paper collage, free motion thread sketching, machine applique and painting on cloth.  We created 2 different projects using related but different techniques.
We started with getting messy by painting some papers to use in the collage work.  Libby uses deli paper as a mainstay of her painted papers, but also recommends maps, book pages, sheet music, etc. She even gave us some Monopoly money to paint! 
Paint can be applied with a brush or fingers (or both) and stamps and other objects can be used to add additional color and pattern.
Here is Sue's friend Paula getting messy!  We also worked with gelatin plates to create papers and fabric prints.
Here are some of Sue's painted papers, some of which you may spot later in her collage.
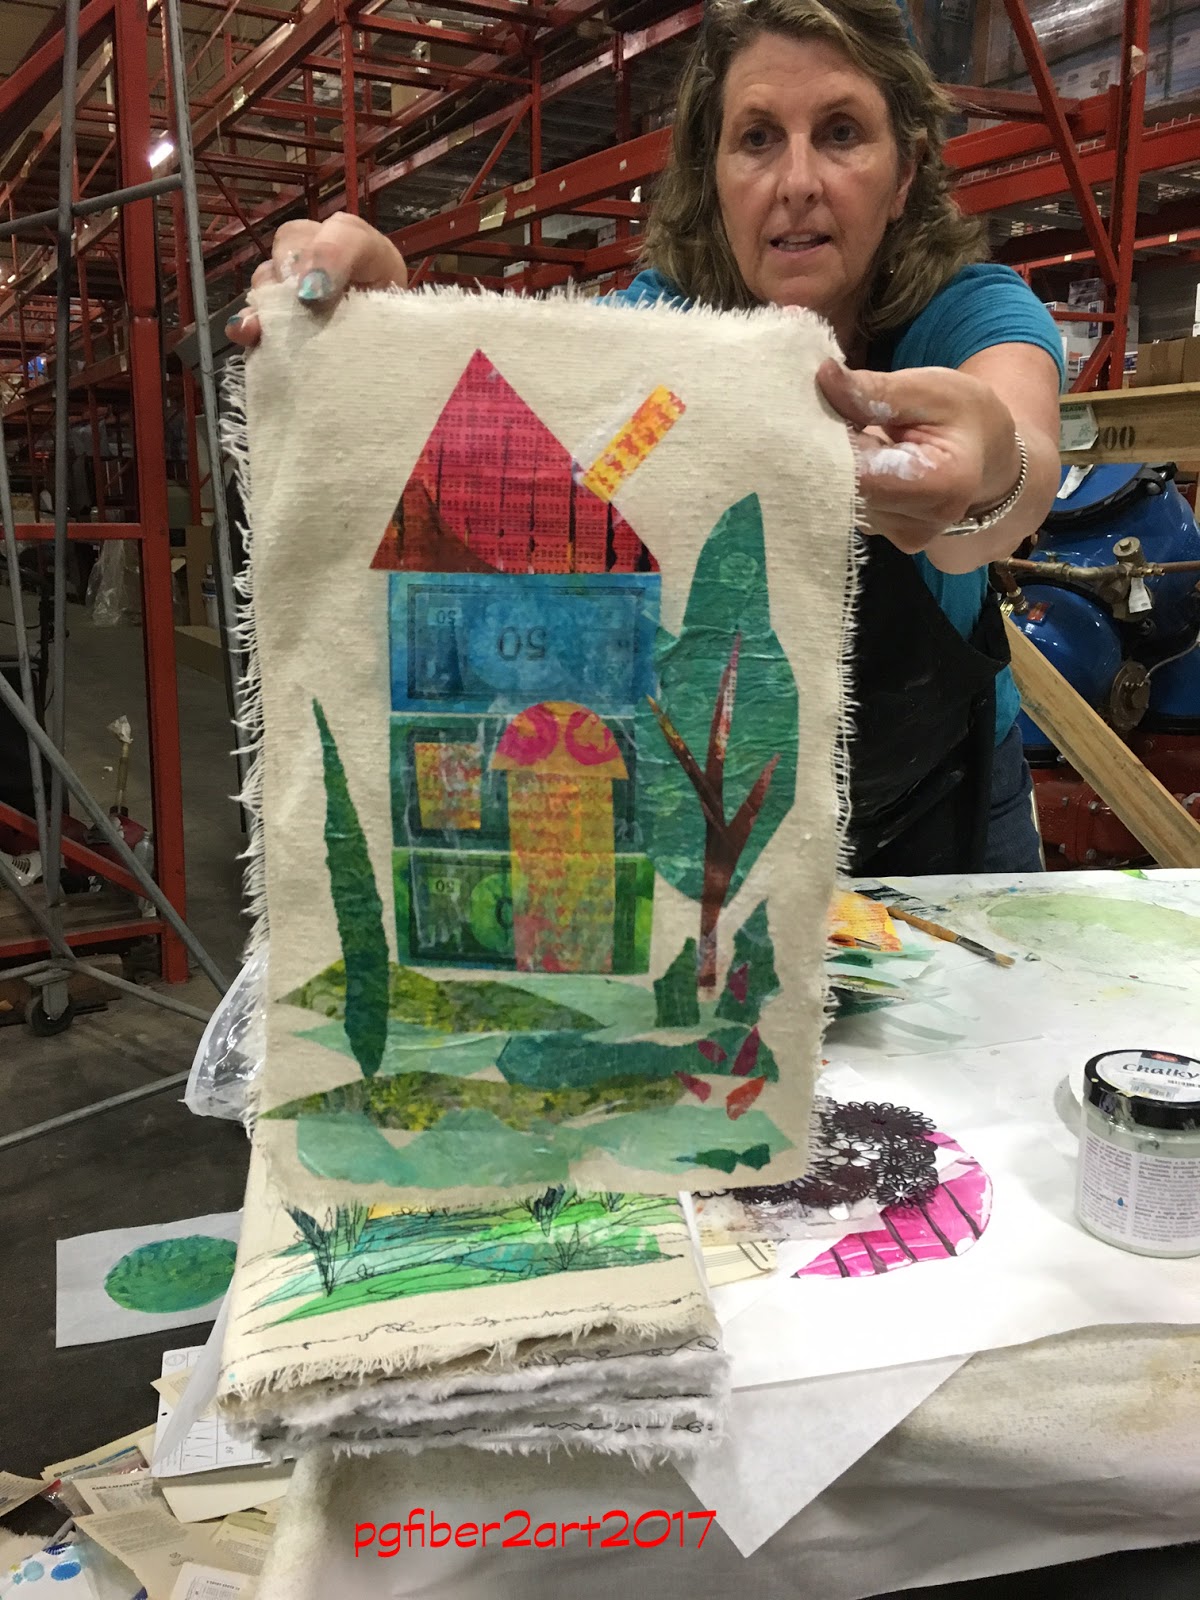
This is one of Libby's collage samples.  The background is a heavy canvas that is fringed on the edges.  The colored pieces are all painted papers that are applied with matte medium.  Details are added with free motion stitching in black thread.
Here's the piece Libby did in class to demo the collage process.  Notice the 3 segments that make up the house are the Monopoly money.

We did so much in the 2 days, that I decided to break the post up into 3 parts, so be sure to check back for more.  Libby is a fun, relaxed, and generous teacher and I highly recommend her classes.  Here is a link to her blog.  Libby will be teaching at Craft Napa in January 2018, so if you are contemplating attending this 4 day retreat, check out Libby's classes.  (Sue and Paula attended Craft Napa this year.)

Wednesday, June 14, 2017

Wedding Signature Quilt

Another UFO got finished in May - this one is a wedding signature/memory quilt made for Sue's niece, so it has been in the works for a year, and became a 1st anniversary gift.  Meghan and Tim decided not to have a guest book at their wedding, so the quilt, in essence, became their guest book.  Sue made the blocks in advance so that guests could write their messages on them at the reception.  More than just signatures, guests included their well wishes for the couple's future. 
The project started by choosing the fabrics for a rail fence pattern, which required light, medium and dark fabrics.  Because Meghan wanted neutrals, and not the darker values Sue originally selected, the values are more light, medium and darker medium.  The plan was for a scrappy quilt, and most of the fabrics are batiks.
Combinations of the light-medium-dark strips were sewn together, cut into 6.5 inch blocks, and backed with freezer paper to provide some support for writing on them. 
The blocks were assembled in groups of 4 with the darkest strips coming together at the center of each block.
Getting the top done was the easy part, the challenge was determining how to quilt it.  Sue finally settled on creating a heart design for each of the 12" blocks and drew a template on Golden Threads tissue paper.  After drawing the design once, she used the unthreaded sewing machine to transfer the design to the other sheets of paper.  That part was harder than the actual quilting, because electronic machines don't like to sew without thread and keep stopping!
Here's a view of the quilting design from the back where it's easier to see. 
The border design was found in a book and also traced onto the tissue for stitching.
Here's a close-up that shows the block and border quilting.
And here's the happy couple with their finished quilt!

Tuesday, June 13, 2017

Tackling the UFO Pile

Sue has spent the last  couple of months finishing some UFOs - of course having some deadlines helped.  One of those UFOs she calls Primary Improv - it is a modern improvisational quilt that she finished to submit for the "Heritage Redefined" exhibit at the Virginia Quilt Museum.  This exhibit of modern quilts in Virginia is being curated by Susan Emory.  Results of the jurying are expected to be announced next week.  The exhibit will be on display from September 5 to December 16.

Sue's quilt got it's start last year in a class on improvisational piecing with Rayna Gilman, author of Create Your Own Free Form Quilts.
We started out making building block units, taking strips and sewing them together randomly, inserting strips into more solid blocks, and just "playing".  No measuring required, uneven shapes and sizes are better, as well as curved or "wonky" piecing.  Repetition of colors and fabrics is important to unify the blocks. 
This is the piece Sue ended up with at the end of the day.  When she decided to finish this to submit to the exhibit, her first thought was adding to the outside to make it bigger.  But after attending a lecture by Cindy Grisdela, another improv quilter, she decided it needed some solid or almost solid insertions to provide more places for the eye to rest - there's a lot going on here!
This is how it looked after opening the center seam, inserting a new section, and adding some borders.  The next challenge was quilting.
With so much piecing in the main body of the quilt, it seemed best to keep the quilting here simple (diagonal lines) and save the fancier stuff for the more solid areas.  Using a variegated thread (King Tut by Superior) shows off the free-motion quilting.
Above is the finished quilt.  You can click on it for a larger view and a better look at the quilting.  We'll post an update next week with the results of the jurying.

Monday, June 12, 2017

Moon River

Oops, I lied - or perhaps misspoke is a better choice of words.  On Facebook, I termed our Saturday post of Elizabeth's favorite FMTTM quilts as the final installment.  However, I forgot that I hadn't mentioned my Moon River quilt.  I did post about it and the process early in 2016 after the exhibit was juried, but I don't think it hurts to share it again, especially for any viewers new to our blog since then. 

The process of making Moon River was challenging.  There were a few trial and error elements to this quilt that evolved over time.  Starting with the moon, I had a shibori resist piece done with large circles, so I used one of those circles, which were light blue surrounded by indigo, and printed with silver paint on half a head of cabbage to give it texture.
In the first incarnation, I kept the indigo surrounding the moon as part of the sky, but wasn't happy with the sky so ended up cutting the moon out and making it a fusible applique on top of the reworked sky.

The river was the other important part of this piece and I had purchased several batiks that I thought would work, but as I auditioned them and went through my stash, this piece of pole wrapped shibori jumped out as being the right one.  Both the shibori pieces were created at "quilt camp" in New Hampshire in the summer of 2015. 
Back to the moon.  It needed more shine than just the paint, so I fused some Angelina fibers together, then fused them on top of the moon to give it a glow.  The sky was redone with wavy piecing and embellished with fibers.  (The first go round used raw edge strips that were straight; it needed the wavy edges instead.)
The trees were cut from a batik, fused on to the dark green background, and then stitched.  Those in the path of the moonlight were stitched with "shimmer" thread for extra sparkle.
In the bottom left corner of the quilt is a rock made from a hand dyed fabric and thermofax printed with a crackle screen.  Next to the rock is the silhouette of a boy, contemplating the river and where it might be going.  The song lyrics by Johnny Mercer are reminiscent of his youth in the southern US and his longing to expand his horizons, so that is my tribute to the lyricist.
Also in the corner is a QR code which, when scanned with a QR reader on a smart phone, links to a YouTube video of the Andy Williams version of Moon River.

I'm pleased with the end result, though it was a bit of a struggle to get there!
Here's the link to Susanne's gallery page that includes the artist statement.