Wednesday, June 24, 2020

Dye Day

Last week Sue participated in a socially distanced dye day at Artistic Artifacts.  The class was limited to 7 and each participant had their own 6 foot table, their own supplies, and masks were required.  The method of dyeing employed was low water immersion, done in quart canning jars.
Judy prepared the dyes for everyone; we started with 3 colors - turkey red, mixing blue and sun yellow.  Each person had a pan holding soda ash water to soak our fabric pieces in, and a jug of plain water. Soda ash acts as the fixative to bond the dye to the fabric.
We started with a layer of fabric in the bottom of the jar, then added a quarter cup of the dye concentrate mixed with a quarter cup of plain water. Then another 1/4 cup of soda ash water was added. On top of that, we placed layer 2 of fabric followed by another color of dye and soda ash water, then layer 3 on top of that.  Six jars were assembled with the first 3 colors of dye. Then we were provided 3 more colors - turquoise, fuchsia, and orange. Some yellow and butterscotch were also available.
A total of 11 jars were assembled with fat quarters of fabric, handkerchiefs, doilies, laces and trims.
Above are some of the handkerchiefs.
This group of fat quarters are probably the least successful.  Lesson learned: its probably best to stick with just 2 colors in one jar. Either that, or make sure each layer fills the width of the jar, so there is less  travel of the dye between layers.  Some of these may get some discharge treatment (taking color out) or over-printing.
The top 2 in this photo combined fuchsia and orange.  The bottom 2 combined orange and butterscotch.
In this photo, the top 2 pieces were in the bottom layer in 2 different jars and were folded in accordion pleats.  Both contained the red, blue and yellow dyes,, but in different order.  One had blue as the bottom layer, and the other had red as the bottom layer.
Top 2 were in red/blue/yellow jars.  The bottom 2 were in turquoise/fuchsia combinations.
The bottom 2 here were also in fuchsia and turquoise. The top 2 were a combination of turquoise and yellow.
While all the other fabrics are 100% cotton, these last two are a cotton/silk blend. They were middle layers in the red/blue/yellow jars.  They are actually rectangular but because of the blend, the corners curl up.  The fabric has a really nice sheen to it; in hindsight, Sue might have preferred to dye these by another more controlled method.  

There are also some other handkerchiefs and trims that unfortunately turned out pretty dark.  Those pieces are additional candidates for discharge or other method of color removal.  We'll be sure to share photos when those results are available.  That is the serendipity of this method of dyeing. Some pieces turn out great, others less so. But with more practice and careful consideration of color combinations, results are sure to improve.  The next dye day on June 27 is sold out but there is another on the calendar for August, and an indigo dye day in July.  You can find the class calendar here.

Wednesday, June 17, 2020

Vintage Challenge

Sue's monthly art bee issued a challenge last fall to use some vintage items in a 24" square wall quilt. One member, Barbara, had some vintage hexagon blocks that she offered to be used.  Sue shared embroidery transfers that she found in her mother's things that were likely from the late 1930s/early 1940s.  The challenge was to use these items in the quilt.
This is the hexagon block that Sue chose.  There were a variety of fabrics and each member chose the one that appealed to them. 
Here is an example of one of the embroidery transfers.  There is a stack of these folded up sheets that contained images for, as in this case, luncheon cloths; also napkins, dish towels, quilts, children's clothes, basically any household textile.  Sue chose to use the flower motif in the corner in her piece. The hexagon flower was the starting point, and after looking at the colors, she remembered an unfinished embroidered dresser scarf in her mother's things.  
This design was embroidered at both ends of the unfinished piece.  The colors seemed to blend perfectly with those of the hexagon, so Sue decided to cut off one end to use in a whole cloth quilt. 
The concept as you can see was to use the hexagon as a flower.  The stem was cut and fused to the fabric and then the hexagon was fused on as well.  Both were hand stitched with a blanket stitch around the edges.  The other element to be added was the transfer image, which Sue placed in the two top corners and hand embroidered.
Next, a border was needed. Again, a vintage textile was put to use.  Among the things Sue kept from her mother's belongings was a tablecloth; even though stained and with a few holes, it held memories of baking cookies, as it was used for cooling cookies after they came out of the oven.  The blue was a perfect match for the blue embroidered ribbon in the center.  The border here was cut from the border of the tablecloth.
The center portion was quilted with an all-over meander. The border quilting followed the pattern divisions of the flowers. In this photo you can see a close-up of the corner embroidery.
Above is the finished piece, which serves not only to meet the challenge, but also as a memory quilt honoring Sue's mother.  

Several other bee members met the challenge and gave permission to have their pieces included in this post. Holly Cole very cleverly used her hexagon block as a background by creating a digital image that was used to create a repeat pattern that she had printed on yardage.  On the right in this photo you can see the original block she chose.
Her central image of the 2 women and a dog is from a vintage photo, and is heavily embroidered.  The transfer image she chose is used as a frame for the portrait; in the close up below you can get a better look.

Anne Smyers used her hexagon amongst a cascade of floral motifs on her quilt.  The outside and center edges are satin stitched.  The grapevine embroidery (done by hand) is the transfer image she chose to use.
Below is a close up of the embroidery.
All elements are very effective against the pieced neutral background.  You can see more of Anne's work at annesmyers.com.

Terry Peckarsky had fun with her hexagon block, using it as the central motif of a 9-patch style quilt. For the remaining blocks, she made hexagon shaped crazy-patch blocks that complement her center block.  Vintage colors add to the theme.
The transfer pattern was used as the quilting design on the eight blocks surrounding the center.  You can see more of Terry's work on her Instagram page @tpeckarsky. 

Didn't everyone do a great job?  It's so interesting to see how each interpreted the challenge. These pieces would be lovely exhibited together.  Perhaps you'll see them in next year's QU show!

Wednesday, June 10, 2020

Blessed are the Piecemakers

This quarantined spring has been a time to get ideas out of the head and onto fabric.  Sue's mother Marie passed away on May 29 of 2019, and ever since she has wanted to honor her memory with a quilt.  With outside activities cancelled and so much time at home, the opportunity presented itself to bring these ideas to life.  The quilt she made is a tribute to her mother as a maker and her working life spent as a sewing machine operator and sample maker in garment factories in Berks County, PA. In addition to sewing for a living, she sewed clothes for her 3 daughters, and taught them all to sew as well as other handcrafts.  This post is intended to give some of the backstory of the quilt as well as a look at the construction process.

The project started out by photographing and making Thermofax screens of Marie's tools of the trade, which included scissors, 2 sewing machines, an oil can and thread stand, and notebooks where she kept records from her factory work.  One of the sewing machines is the Necchi domestic machine she sewed on for many years, and taught her daughters to sew on, the other is a Merrow overlock machine from the last factory she worked in.
These images were printed on both natural and colored linen.  The color scheme came from a piece of fabric that is used in the piecing as well as on the back of the quilt.
There are also screen prints of Marie, and the quilt title "Blessed are the Piecemakers", chosen because factory work is piecework.  Sewers receive bundles of garment sections containing a dozen pieces, and pay is based on completed bundles.  Each segment of the construction process is a "job", and each job has a code number.  She worked in several different factories, from making men's cotton underwear to hosiery to women's clothing.  She was skilled enough at the various jobs and machines to become a sample maker.  The last factory she worked in closed in 1984 as more and more of the garment industry moved first to the south and then off shore in search of cheaper labor.    
Texture was added to some of the fabrics and linen prints by geli plate printing with bubble wrap.  Paint is rolled on the geli plate (in this case a circular one), then the bubble wrap is used to pick up paint and transfer it to the fabric.
After making various components, it was time to start playing with the layout.  This was one of the beginning ideas which you'll see changed a bit in the final product. The vertical fabric strip helped set the color scheme.
This version is closer to the finished piece, with eliminations and additions and moving things around, but still needing a spark.
These buttons and old spools of thread (from Marie's collection) were also made into screens. You can see them printed on the quilt in the picture above and below.
Above Sue was trying out a black & white stripe fabric to add the missing spark.  There are also some dyed laces added.  All of these required taking some seams apart to make the additions.
This is the finished quilt, with a black & white fabric also used for binding, and below is a close up.  
The quilting is simply wavy lines with bubbles in a few places so as not to detract from the graphic images.  Interspersed in the piecing are strips with the handwritten story of her life as a maker, meant to be visible but not necessarily readable.  

The piecemakers put a lot of effort into the American economy in the 20th century and made us proud to wear the "Made in America" label. They worked hard for their wages and were able to support their families and move into the middle class to provide a better future for their families.  Blessed are the Piecemakers.

Wednesday, June 3, 2020

What we Missed this Spring and Making it up with Online Learning

Since the pandemic started, we have missed out on some of the planned events Sue and I hoped to attend. First to be canceled was our Virginia Consortium of Quilters March meeting in Williamsburg.  As their program chair it was hard to swallow as a lot of work goes in to setting up a meeting.  Next to be crossed off the calendar was our VCQ biennial quilt retreat at Smith Mountain Lake, following was a class we were to teach at Artistic Artifacts, and then a new adventure at Red Thread Retreat in rural Maryland with Lesley Riley.  No Northern Virginia quilt show and the realization that we would also need to cancel our VCQ August retreat.  Lots of disappointment.  Plans to attend Threads of Success in Houston in late October are likely also squashed.

On the bright side, so many new opportunities have popped up.  Like many of you, we learned how to use Facebook Live and Zoom and found ourselves in Yoga class, Zentangle sessions with Marisela Rumberg, business inspirational/informational meetings as well as frequenting sewing and quilting professional and group pages which were offering lessons or advice online in a live format.  There was also time to learn new things from YouTube and Vimeo videos.  Like many industries with a history of providing service to customers, the crafters and makers of the world have stepped up to make masks to help protect from the spread of the virus while still keeping their creative inspiration active.  Craft and quilt teachers have adapted to the online platform and some may never return to in-person events again which involve a lot of travel, preparation, toting of supplies, etc.

This spring, we witnessed a vibrant and fun Sheep and Wool Festival as they went online in quick order to make a weekend of fun at the fairgrounds turn to fun online.  They even kept right on going when the server stopped working due to overload and rapidly found a fix to stay afloat and continue online still. Yea, to the fiber artists! Quilt shows like the Quilters Unlimited Show in Northern Virginia also went online, QuiltCon, the modern quilt guild show, announced that in Spring 2021 they will be virtual and with 10 months to plan, no doubt they will be able to put on a fantastic show.  Other Quilt conventions are also announcing plans to hold virtual shows and professional quilt and craft teachers are figuring out which type of platform suits them, some will be live, some may be taped.  All will help fill the void we creatives feel in our lives.  If you have an online opportunity you would like to share, feel free to put information about them in the blog comments.

Last Thursday, Elizabeth took a class on ombre dyeing from Cindy Lohbeck on a platform called liveonlinequiltclass  This class was offered as a four hour live class where the students followed along and dyed as Cindy demonstrated.  You could buy a kit and the class as a package or the class alone if you wanted to secure your own materials. Elizabeth opted for the kit since it included a rack which, she felt, was essential to the process.  Since she is also not in Virginia during the quarantine she needed the dyes and fabrics and other pieces of the kit.  It is nice to get it all in one package but also generous of Cindy to offer the course with use of your own supplies.  You booked and paid for the class on the liveonlinequiltingclass.com website; if you needed other supplies later, such as refill dyes, you can buy them on Cindy’s website handsonhanddyes


The morning of the day of the class you are sent a Zoom link and instructions for a phone or tablet app or a computer.  Half an hour before class you sign on so you can work out any tech issues that may arise.  The class was moderated by another teacher who went over the technology and how to use Zoom; such as how to pin the screen so you only saw Cindy and how to use the chat box.  If you had questions you typed them in the chat and the moderator read them so Cindy could answer. Everyone but Cindy and the moderator was on mute. It all went remarkably smooth.  Four hours was long and exhausting but also fun and invigorating to be involved in something creative lead by someone else.

During class we made two Ombres, one in golden yellow and one watermelon dye colors and one color to color piece where you picked two of your remaining dye packets which would be analogous on the color wheel and where one end is purely one color and the other end is purely the other color with blends in between.  It was very special to learn how to create this technique.  If you think it is something you would like, please get on the mailing list for both liveonlinequiltclass and Cindy Lohbeck at Handsonhanddyes.com   The technology was easy and you won’t be disappointed with all the tips, tricks and techniques you will learn.

Here is the work accomplished during class.  The kit included more supplies for four more to do on your own.

Golden Yellow Ombre
 Watermelon Ombre
 Grape to Kingfisher blue blend


Wednesday, May 27, 2020

Postcard Swap

Sue's fabric postcard swap group is still carrying on after about 15 years, swapping cards twice a year.  We are still at 5 members, though one of our originals bowed out after the last exchange. However we picked up a new member so we break even.  Our spring swap is due by the end of June; 3 of us have sent our cards, while 2 are still in the works.  Sue sent hers out last week so it's safe to reveal here on the blog.

The theme for this go-round is "corvids".  Corvids, also known as the crow family, is a family of birds that includes crows, ravens, rooks, jackdaws, jays, magpies, treepies, choughs and nutcrackers.  Before doing a little research, Sue only knew of crows being in this group, so when she saw the other birds included, she chose to feature the blue jay. Since those in her back yard didn't cooperate for a photograph, she found one licensed to use on Wikimedia Commons taken by Jocelyn Anderson. (https://commons.wikimedia.org/wiki/File:Blue_Jay_(185317371).jpeg ) Sue's first step was to alter the image in Photoshop to remove the background and apply a filter as she does when creating screen images. Then the image was printed in black and white on inkjet fabric sheets.  (Sue uses EQ Printables by The Electric Quilt Company)
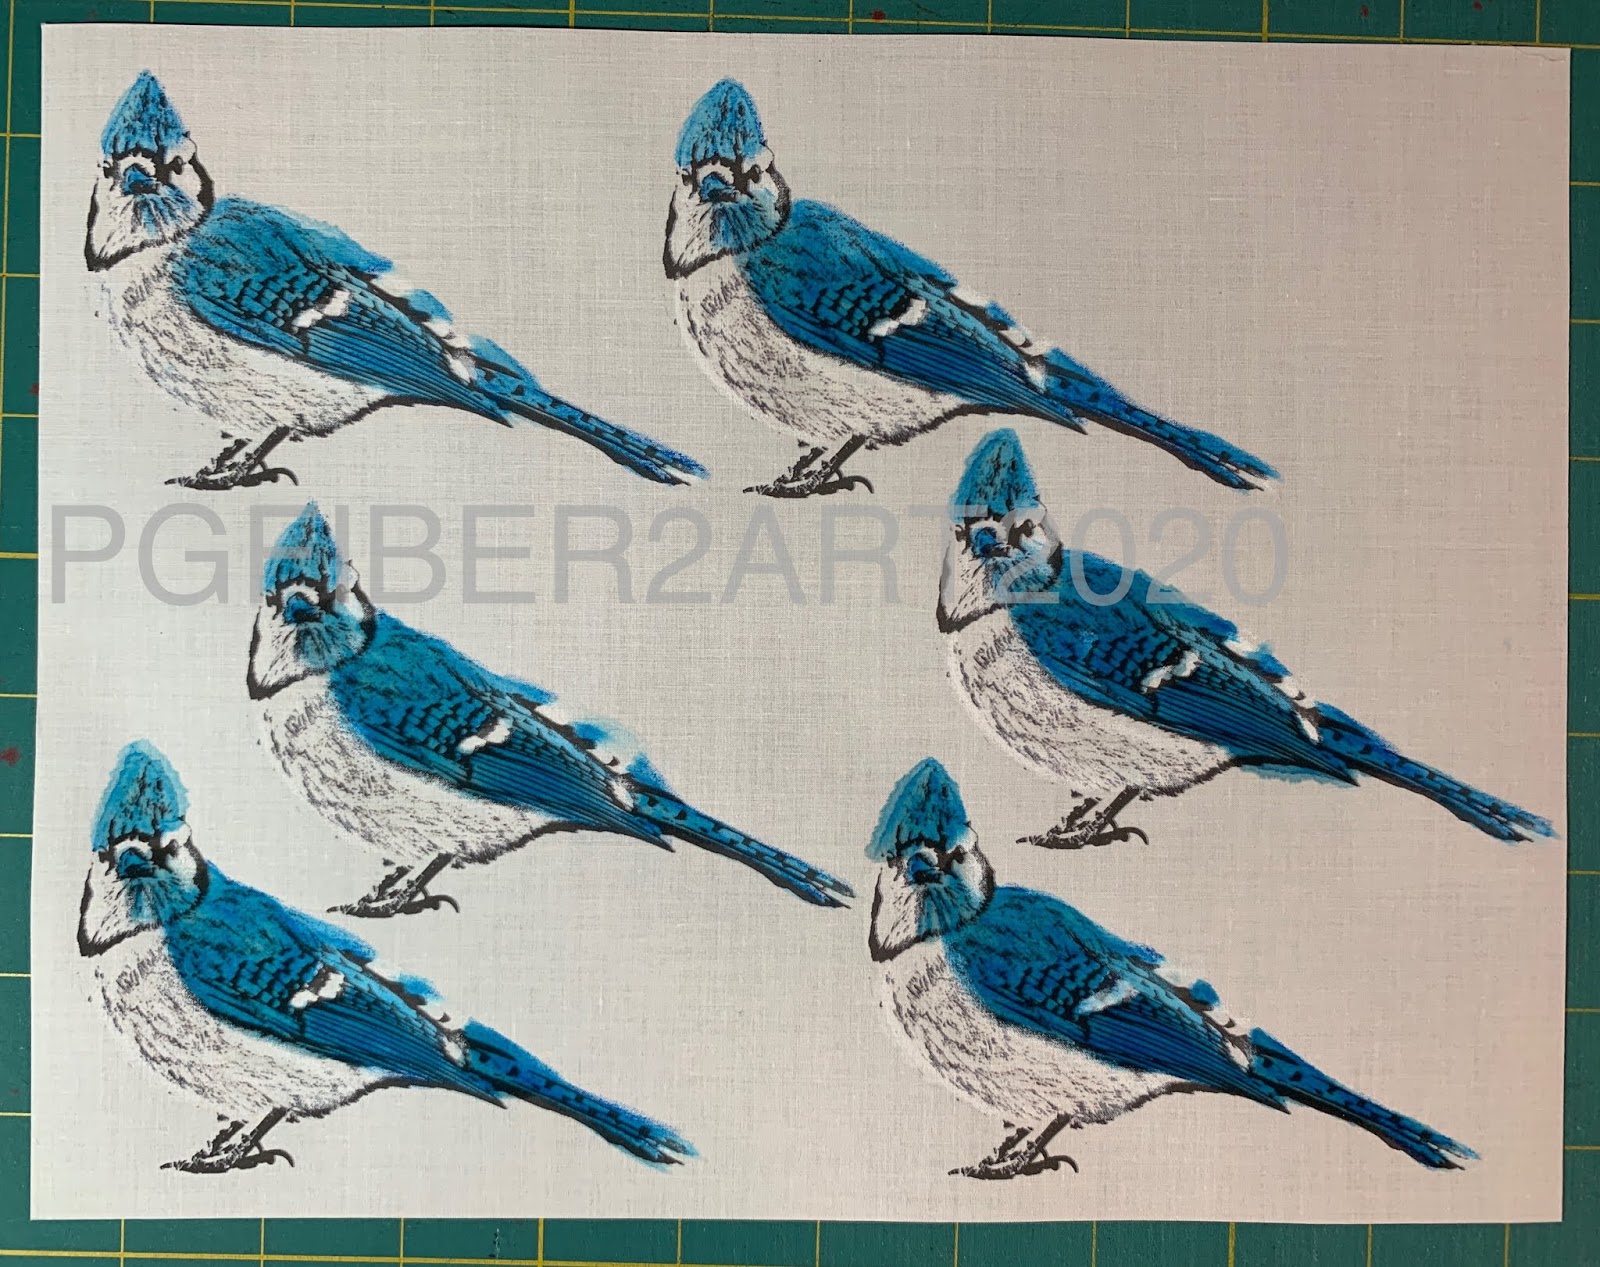
The images were then colored with water soluble wax pastels made by Reeves, and cut out.  After applying the color, brushing over it with water softens and blends the color.

Finding a background for the card was the next step.  Sue settled on a piece of ice-dyed fabric that was mainly green but with bits of other colors to give the effect of a tree or greenery. The base of the postcard is a stiff fusible like Peltex that is fusible on both sides, so the fronts and backs of the cards can be fused in place before stitching.
Then a branch was cut out of brown hand-dyed fabric and fused on top of the background.
Some machine stitching added texture to the branch. Then the blue jays were fused on top and stitched around the edges.  The fusible product used is Mistyfuse, a very thin fusible.
After adding the backing, the edges are satin stitched.  Here's a close up.
The other 2 cards received so far both feature crows.
This interpretation of the theme is by Grace Ng.  One member pointed out that 3 crows together means "health".  How appropriate!
Cathy Tyler created her version of Mourdour, a talking raven who lives in North Yorkshire, England.

Can't wait to see the next two cards!

Wednesday, May 20, 2020

May Musings

Wow, again its been 2 months since our last post.  You would think with all this time staying at home through the corona virus pandemic that we'd post more often.  But like many of you, we seem to be focused more inward, just trying to maintain some semblance of routine in this very abnormal situation. For most people this has been a time of reflection and adaptation.  Whether working at home, home schooling children, sequestered with your spouse or housemates, or home alone, it may still be some time before we get back to life as we knew it so trying to keep a routine and healthy habits is important.

Sue is home in Virginia with her husband.  She maintains a fairly consistent exercise routine - walking, online Zumba and yoga classes.  Working on various quilt projects, some just for mindless sewing, other art pieces that require more thought and time.  Of course there's been the mask making and also PPE gown making for her sister-in-law who works in a nursing home.  And making bi-weekly trips to the grocery store.  Her husband rides a motorcycle, so they have been able to take some rides for a welcome change of scenery.
Elizabeth was in Mississippi at her mother's house when the stay at home orders started.  She and her sister had the goal of finishing cleaning out the house in order to put it on the market this spring.  So she is still in Mississippi, unfortunately without a sewing machine!  All those sewing tools had previously been removed.  So she has had to find different creative outlets.  In addition to continuing to make cyanotype prints, we have both been following Marisela Rumberg as she leads Thursday evening Facebook Live classes on Zentangle, and have now completed 10 lessons on this abstract drawing method. (#ZentangleBeforeBed)

In case you were wondering, our Thermofax screen business is still going strong.  Most all orders through the Etsy shop are prepared and mailed without leaving home.  Supplies are sourced online. We added some new screens to the Etsy shop in March and April; if you're a newsletter subscriber you'll have seen them.  If you're not, you can subscribe at the top right of this page.  We are also always happy to make custom screens for you to assist in your creative endeavors. Just be sure there are no copyright restrictions on images you send us for screens.
Like many of you, we are missing family and friends and those routine activities we may have taken for granted. Birthdays, holidays, graduations pass without the usual celebrations.  Elizabeth missed her grandson's 2nd birthday.  Sue's family celebrated a socially distant Mother's Day.  We treasure the opportunities to connect over Zoom or Facetime.  Special events have been cancelled over the last 2 months and in the months to come. Already several quilting events for early 2021 have announced that they will transition to virtual events instead of live. (QuiltCon, Craft Napa) Still others like International Quilt Festival Houston remain on the calendar, waiting to see what happens. But we carry on, like you, trying to make the best of the situation.
What have you been doing/working on over the last few months?  Have you focused on UFOs?  New projects? Mask making?  Learning something new?  It seems that opportunities abound for online learning, projects and quilt alongs in the creative community.   What have you done to maintain a routine in this time of uncertainty?  Please share your thoughts, projects, new endeavors in the comments or on our Facebook page.  We so appreciate hearing from you, now more than ever!

Monday, March 16, 2020

Daisy Meadow - Thermofax Screens for Fusible Applique

Last month Sue completed a piece for the Backyard Escape exhibit being curated by Sacred Threads.  There will be several groups of traveling exhibits that will be shown at hospitals and quilt shows beginning in May 2020, and then will come together at Sacred Threads in July 2021.  The "backyard escape" theme was to showcase something that brings you peace and tranquility in your backyard, that could do the same for patients and families in a hospital setting.  All the works are to be for sale, so there is also a fund raising aspect for the hospitals involved.

Sue's "Daisy Meadow" combines a background technique by Terry Kramzar which she also used last year in a piece called Balloon Flowers, along with fusible applique created from screen prints. This is the finished quilt, but we also want to share the technique for the Thermofax printed flowers.
But first, the background. The 4" finished background squares are made from an assortment of batiks and are layered with fusible batting, then quilted prior to assembly.
After quilting, they are trimmed and then ready for the center squares which are also from a variety of batiks.  Terry's special ruler makes trimming and placement of the squares easy.
Then the squares were arranged with darker values at the bottom and lighter values at the top.
After the squares were sewn together, it was time to create the flowers and stems.  Sue chose our "lazy daisy" screen in 3 sizes to print with black acrylic paint on yellow fabric.
These need to be backed with a fusible product before cutting out.  Sue used MistyFuse, but you could also use Wonder Under or Steam-a-Seam2 Lite, or another favorite fusible, as long as it is fairly thin.  You don't want to add stiffness or something that might gum up on your needle when stitching. After fusing, cut them out, then you are ready to create your arrangement on the background.
Play with the arrangement until you are satisfied.  Consideration was also given to where the stems would go and what needed to go underneath what.
Here's the arrangement with stems and leaves added.  The stems & leaves were fused and stitched before the flowers were fused in place. To maintain your arrangement, take a picture for reference and you can also lay them out on another surface the same way you want them on the quilt.
The flowers were all edge stitched in black along the printing lines, and then the petals have some accent stitching in yellow.
And finally, a close up detail shot.  We have a number of screens in the shop that work well for this fusible applique technique, including various flowers, leaves, a bird, butterflies. If you have a photo of an item, you can turn it into a screen - all of those items mentioned started out as photos we took. And like the flowers, when they are digital, you can create various sizes.  What photos do you have that would make great appliques?