Monday, July 22, 2019

Sacred Threads 2019

If you've been a follower of our blog, you've probably noticed that we haven't posted in a few months.  Sometimes life happens, and certain things become less important.  Sue lost her mother in May, not an unexpected event as she was 97, but still, losing your mother is never easy.  And keeping up with a blog has not been a priority.  We have been posting regularly on Facebook and Instagram though so hopefully you've kept up with us there.  Unfortunately, once you step away from a blog routine, it is easy to let it slide.  We often wonder if people are really reading it; is it worth the time that goes into it?  I guess we'll see.

The impetus for finally getting back to the blog is the current show called Sacred Threads that is on exhibit here in Northern Virginia.  It's got another week to go so if you are anywhere near by, it is well worth your time to make the trip to see it.  This show is unlike any other, in that it features quilts on the topic areas of joy, inspiration, grief, healing, spirituality and peace/brotherhood.  The maze-like set-up provides a very intimate setting as soft music plays in the background. It can be a very emotional experience, especially in the section devoted to grief and healing.

Sue took some time to visit the show last week and was back for a lecture and second look on Sunday.  She has a quilt in the joy segment of the show.  These are just a few of the quilts that made an impact on her in one way or another.
Dancing on Dappled Ground is by Norma Fredrickson of Berryville, VA.  Norma is a customer of our Thermofax screen business, so it was nice to see some of her art work in person.
This is Sue's piece called The Bridesmaid. It is based on a photo of her daughter when she was a bridesmaid in her childhood friend's wedding.  Both this and Norma's piece are in the "joy" section.
Ashes of Roses in the spirituality section is by Ellen Eriksen Parrott of Dansville, MI.  The maker has a collection of vintage photos of infants in christening gowns and based this on one of those photos.  She sees both the promise and hope for the child's future while also realizing that this child's life is probably over. Having spent time recently going though vintage family photos is probably what attracted Sue to this piece.
Another piece in the spirituality section is The Stone Bridge by Patricia Caldwell of Cottonwood, AZ. Patricia's work is frequently featured in Vicki Welsh's newsletter (Vicki is a fabric dyer), so it was intriguing to see some of Patricia's work in person.
Another spirituality piece is Mechanical Man by Jim Vander Noot of West Chester, PA.  According to Jim, the mechanical man represents those things in our daily routine we do automatically, yet the spark of life pokes through the cracks.  This is one of those pieces that the closer you look, the more you are drawn in and begin asking 'how did he do that?"
Suspended Moments is by Gabriele DiTota of Melbourne, FL and was part of the healing section.  This piece reflects time spent in a garden and moments in nature that restore the spirit.  The first thing Sue was attracted to was the cyanotype prints in the center, and then the surrounding fabrics with their varied surface design also became apparent.
In the inspiration section was Boundless Love - Cuddle Time by Jane L. King of Longmont CO showing the connection between mother and child. The soft  colors and quilt in the background add to the feeling of calm and peacefulness.
The quilts in the grief section illicit the most emotional reactions.  This piece called Pulse is by Martha Wolfe of Davis, CA.  It shares the text messages from a young man to his mother inside the Pulse nightclub.  As a quilter, Ms. Wolfe is tired of making hearts for victims of mass shootings, and we agree.
Death Toll by Susan Brubaker Knapp of Mooresville, NC is another quilt in the grief section.  It was made to express her sorrow and outrage after the shooting at Marjory Stoneman Douglas High School. The 17 roses represent the 17 victims.  The tic marks represent those killed in mass shootings since 1984 by AR-15.
And back to the section on joy, was this quilt called Daisy Field Exploration by Roberta G. Porter of Batavia, OH.  It is based on a photo of the maker's granddaughter when she was 4 years old and the connection to the natural world that brings joy and beauty.

This is just a small sampling of the 245 quilts in the Sacred Threads exhibit.  In addition, there is a special exhibit called Eye Contact.  Quilters were invited to submit 5" x 23" pieces featuring only eyes.  All submission were accepted for display, and made for a fabulous addition to the show.


Tuesday, April 23, 2019

May Thermofax Printing Class

We will be teaching our next Thermofax printing class on May 18 at Artistic Artifacts.  For Thermofax Technique Sampler, we have refined our focus to concentrate on the techniques and products that can be used to create images with Thermofax screens. This class is suitable for beginners as well as experienced printers, and even if you've taken another version of our class before, there will be some different techniques/products in this one.
We will be working with page sizes of 6 x 8 inches and each one will illustrate a different technique or product that can be used for printing.  Our list runs to about 20, so we will be working diligently to get them all completed in this one day class.  When the pages are complete, they can be assembled into a book in any manner you choose.

These 4 techniques include white paint used as a resist, a 2-screen image that has an outline and fill, foil and glue, and a water-based resist.


Other techniques include printing with multiple colors, using opaque paint, printing transparent paint over opaque, and printing with a combination of Inktense color blocks and matte medium.  


In this example, deColourant discharge product is used on 3 different fabrics to show variation.


Another discharge method uses bleach gel, again on different fabrics to show color variations.


Sue chose to print her labels on inkjet fabric and fuse them to the pages, but you can also just write directly on the page itself, and include more detail such as type of paint and/or specific product used.


Here's the inside cover and first page.


And the page using foil and glue.


We have this and more in store for you so if you are near the Washington, DC area, we would love to have you join us on May 18 at Artistic Artifacts in Alexandria to learn how versatile Thermofax screens can be!

Tuesday, April 9, 2019

Tea Bag Revival

Libby Williamson is a fabulous teacher, as she proved once again in her Tea Bag Revival class at Artistic Artifacts on Sunday.  (She also taught a 2-day Paint and Stitch class on Friday and Saturday.) Sue was in the Sunday class with 2 friends from out of town - all 3 of us took the 2-day class 2 years ago. Libby's art and style is very intuitive and whimsical - very "throw out the rules and make up your own", so there's no pressure to be perfect.  She creates a fun and relaxed environment to try something new. The focus of the class was using tea bags (steeped, dried and emptied) as the foundation for collaged art.
Here's Libby with one of her sample quilts. The brown squares you see are the tea bags.
In the  foreground of this photo, you can see some of the prepared tea bags.  The tea bags are fused to a muslin base to stabilize them for sewing.
Here Libby demonstrates the process for emptying the tea bags and fusing them to the muslin.
This is another of Libby's samples.  Enlarge the photos to get a better look at the mini collages.  We used small pieces of fabric and painted papers to create the collages, which are machine stitched with black thread and also embellished with hand embroidery.
These are Sue's tea bag collages.  All the pieces are "glued" to the bags with matte medium which has to dry before proceeding.
The stitching is kind of intuitive, some just outlining and/or keeping with the mostly geometric shapes.
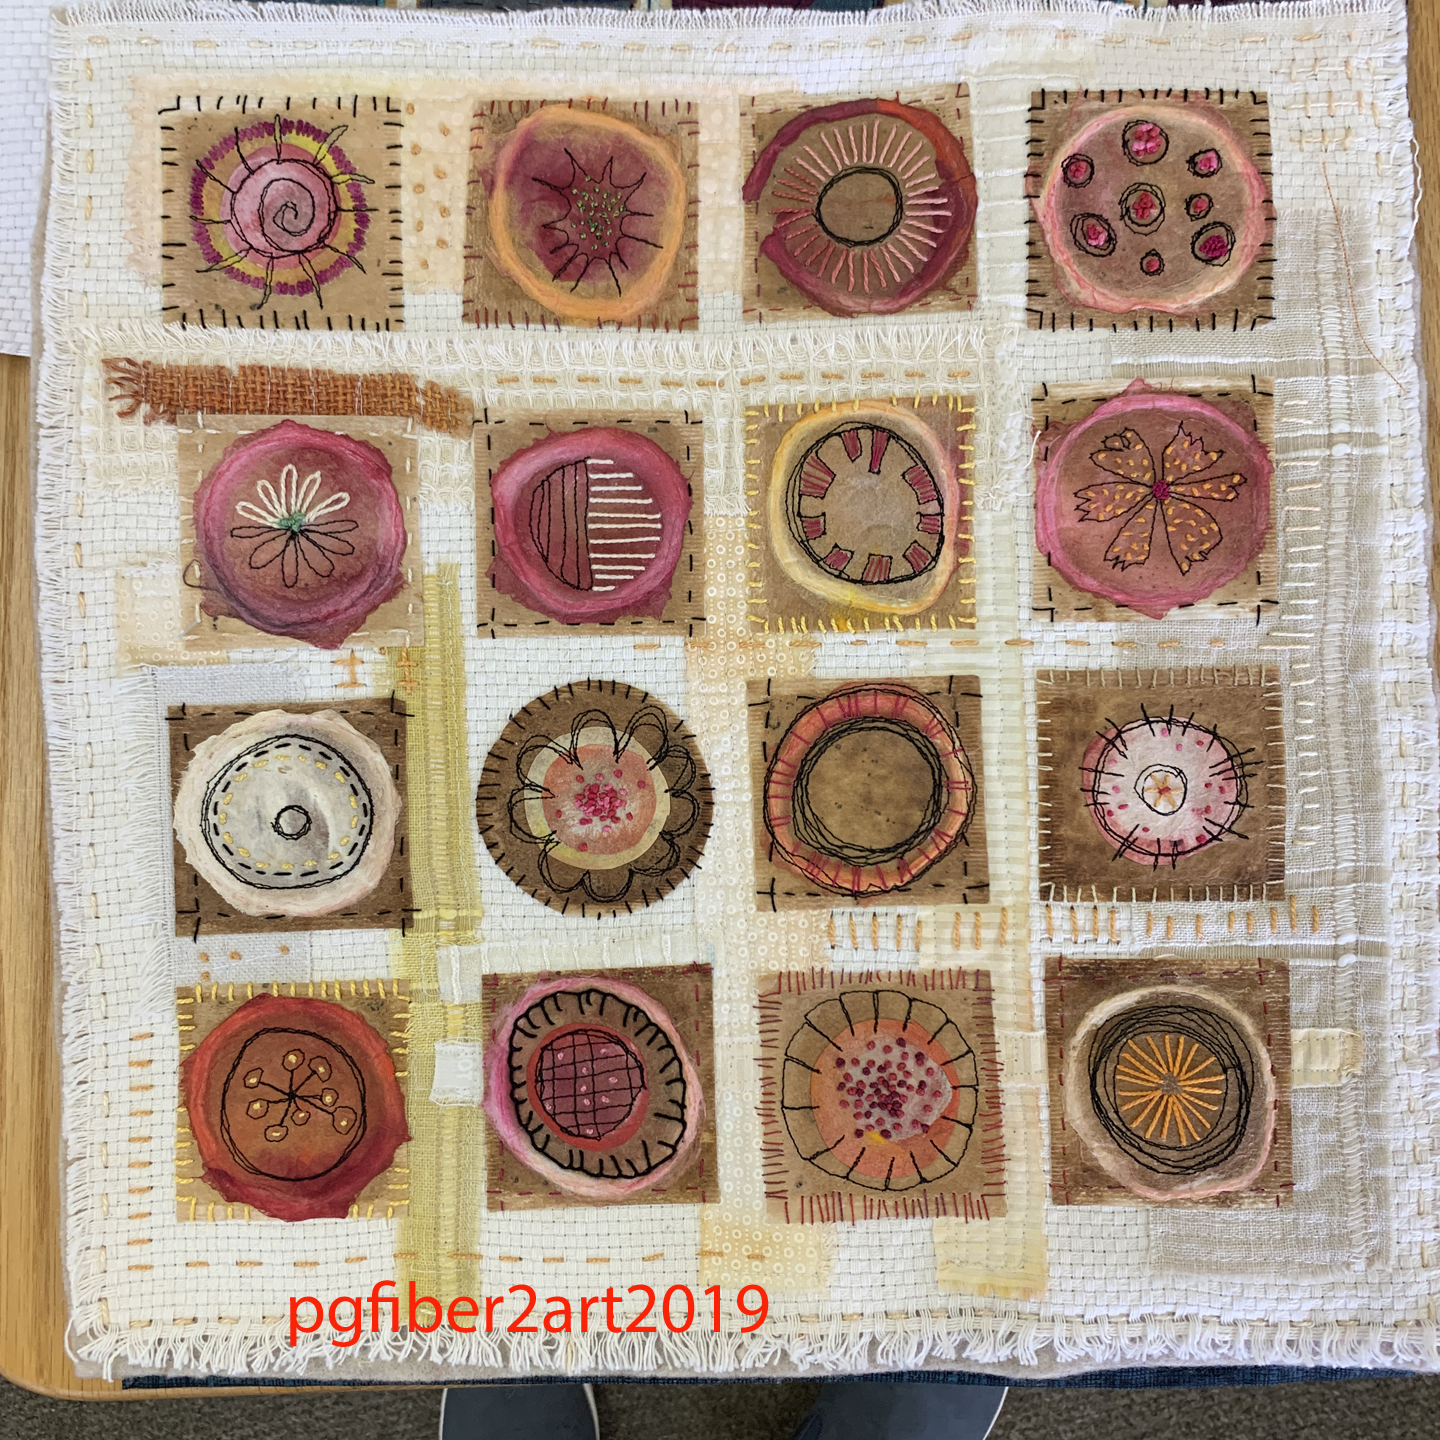
These are the machine stitched collages.  There are 6 more in addition to the original group of 12.  The next step is adding hand stitching.
These are the collages Denise is working on.
And here are Paula's collages.  Aren't they both great?
Libby did some instruction on how she arranges them on the background, as well as adding some other fabrics under and between some of them.
After some additional stitching at home, Sue finished the embroidery on 12 collages.  She is working on 4 more for a grid of 16.  Then it will be time to play with adding some additional fabrics to the background and stitching it all together.  There will likely be more hand stitching as well.  Stay tuned for more on the final product.  This was a fun class and we highly recommend Libby as a teacher.  She teaches all over the country, so if she's ever in your area, sign up!  Libby's website is called Art Soup and you can also follow her on Facebook to see what she's up to.  If you're a subscriber of Quilting Arts, she been a cover girl and has articles in 3 issues - June/July 2017, April/May 2018, August/September 2018.  Check them out!


Monday, April 1, 2019

Zip Up Tray Pouch

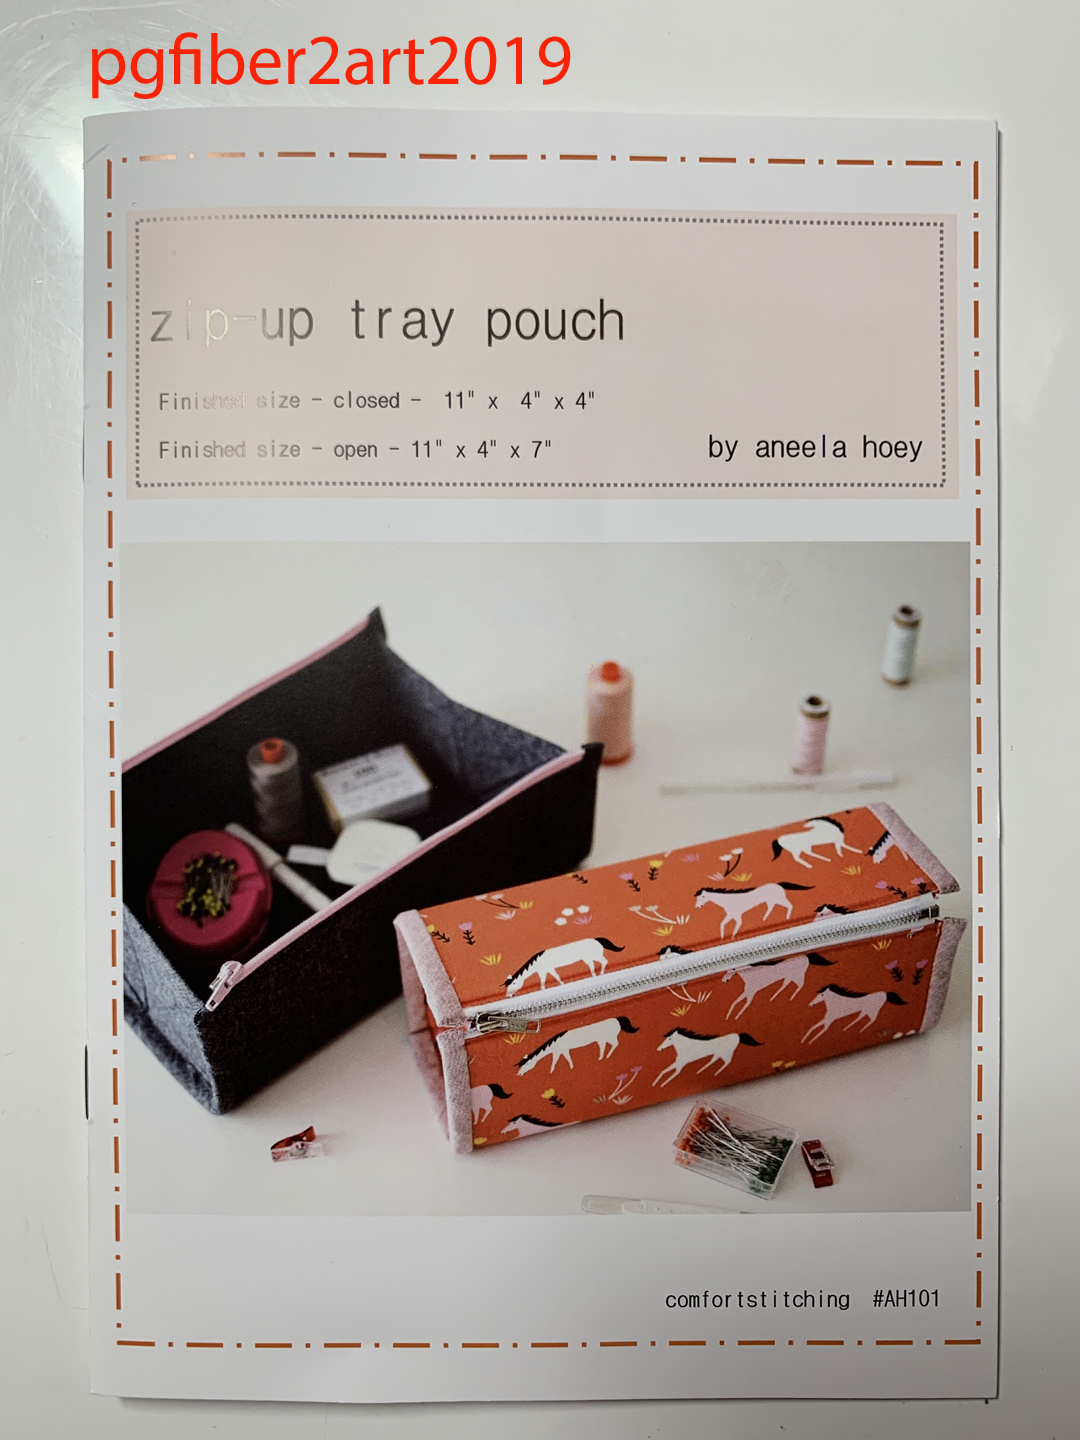
Last week Sue posted a Facebook picture of a zip up tray she made for her retreat.  Since it got lots of curious comments, she decided to make another using some of our printed fabric and share here on the blog about the process.  This is the pattern by Aneela Hoey of the UK which can be found at this link (there appears to be a pdf download).  Sue bought the pattern from a vendor at QuiltCon.
You start with your exterior and lining pieces for the body of the box, which has inserts of a stiff fusible stabilizer such as Timtex, Peltex  or Stiffie (all various brands of the same type) - it is the kind of stabilizer used for hat brims.  This gives the box its shape.
The marked lines are where the divisions will be for the inserts.  Another aspect of the project was to see how this piece of printed fabric would work in a project, since it is an overall large design.
 Attaching the zipper was the next step.  The pattern requires a 10" separating zipper.  Unlike other types of bags where you can use a longer zipper and cut off the excess, this requires an exact size zipper.
After applying the zipper, the marked lines are stitched through the 2 layers in order to insert the stabilizer.
Binding strips are sewn to the long edges before adding the ends of the box.
Adding these ends is probably the trickiest part.  I did make a modification here. The instructions call for sewing partial seams and stitching the part around the corners by hand.  I felt that machine stitching would be sturdier so I clipped all layers into the corner to be able to stitch it by machine.
Here is the finished tray/box from the outside,
and from the inside.  You might be able to see in this picture that the ends contain stabilizer as well, a square and 2 triangles to allow the end to fold when it is zipped up.

I like how the printed design works in this project, as well as how the commercial print lining coordinates so well.  If you're looking for a container that holds your tools and transports easily for your next retreat, check out this pattern.

Thursday, March 28, 2019

Report From Retreat

Greetings from Martinsburg, West Virginia!  Sue's local guild is holding its spring retreat here at the Comfort Inn in Martinsburg, a new venue for our group.  Our previous hotel location in Winchester, VA, is under renovation so we had to find a new location.  This location seems to be working well.  We arrived (most of us) on Wednesday and will be staying through mid-day Sunday.
Here's our workspace before the arrival of any retreaters (except for the committee).
And here we are with many projects in progress.
Our theme is "Wild and Wonderful" and we chose this butterfly design as our logo;  we screen printed it on tote bags that  we used as our "goodie" bags for each attendee, and also on t-shirts for the committee.
This is an area set up as the "fishing hole". Folks bring fabric they no longer need, books, magazines, and patterns and then you can go "fishing" for anything you want!  Recycling at its best.
We also are collecting 2.5" strips for a "wild and wonderful" strip raffle; everyone who brings 2 strips gets their name put in the bowl for a drawing - the more you bring, the more chances to win.  We are also working on blocks for charity quilts using donated fabrics (samples on the board).  
And this is project #1 that Sue is working on, more to come on that.  

And more to come from retreat!  That's all for now.

Friday, March 15, 2019

March VCQ Meeting

Last weekend we were in Virginia Beach for our quarterly VCQ meeting.  VCQ (Virginia Consortium of Quilters) meets 4 times a year in various locations around the state.  This was our first meeting of 2019; other meetings this year will be held the 2nd Saturday of May, August, and November.  It's really a mini retreat - we have 2-3 workshops and a group in Come Quilt with Me working on their own projects.  It's a great chance to get to know and socialize with quilters from around the state and learn something new.  We always have a good time.  Sue took a class on making coiled rope (clothesline) baskets, and Elizabeth took one on making a small crazy quilt.  These photos are mostly from the basket class.
These are some of the sample bowls, coasters and trivets by Paula Harr, class instructor.  She has an Etsy shop called Patchwork by Paula.
This is the beginning of the first coaster.  We made coasters first to learn the technique.
Sue was able to finish 2 coasters in class before starting on a bowl.
This is the start of the bowl.  Sue has made some of these bowls previously, but the cord was completely wrapped with fabric.  Paula's technique uses randomly placed pieces of fabric and variegated thread to add color and interest to the bowl.  This saves time and actually makes the process more fun than when the cord is completely wrapped with fabric.
This photo shows the beginning of building up the edge of the bowl.  You have to hold the flat part up against the side of the machine for several rounds for the bowl to begin to take shape.
Of course, learning when to relax your hold is part of the process.  Sue's bowl shape turned out to be more of the flower pot variety than Paula's which are so nicely rounded.
Though it will not be a flower pot.  It will surely find a spot in the sewing room and will soon be a repository for "stuff".  Hopefully the next one will have a rounder shape!
This is the basket class holding Paula's sample baskets.
Here is the crazy quilt class taught by Karen Lee Carter.
The third class was wool applique done in the center of a churn dash block taught by Sandra Fraenkel.

About 25 people were in the Come Quilt with Me group.  We also had a delicious lunch prepared by the staff of the Doubletree Hotel where we stayed and had the workshops.  So if you're looking for a group that combines quilting with a mini-retreat weekend several times a year, consider joining us at an upcoming meeting.  The next newsletter with information on the May meeting will be out by the end of March.  If you are a member, you will get an email when the newsletter is available online.  If you're not a member, check on the VCQ website for the newsletter - links are on the right hand side of the page.